Posted on

2024 Marks 10 Years in Business

organic landcare
2024 marks 10 years in business

2024 marks 10 years in business – The first job.

2024 marks 10 years in business

Where I’m at now…sort of..

2024 marks 10 years in business

Now, check out the rest of the website and subscribe to my YouTube channel for all kinds of organic urban landcare ideas and other stuff.

Posted on

Growing Potatoes Indoors In The Winter

Growing potatoes indoors in the winter?

Growing potatoes indoors in the winter

Growing Potatoes indoors in the winter?

Why not?!

These are the last of the garden potatoes of 2022. Our biggest crop so far, though we didn’t actually weigh the yield.

Growing potatoes indoors in the winter

I had these potatoes that started to sprout in December or January. So, on a lark, I thought let’s plant them. See what happens. 

Turns out, it’s a thing! Growing Potatoes indoors in the winter?

You can totally grow potatoes indoors in Canada in the winter.

Why am I only hearing about this now?!

Growing potatoes indoors in the winter

The plants shown above? Planted in early February. Once I pulled the planters in from the back yard and let them thaw out for literally a week! December and January hit 30 below. The soil was frozen solid. They were heavy too, I might add.

I planted 5 “chits” in each planter about 3 weeks apart. The first 5 were from our garden that sprouted. Then, I planted 5 more that were store bought and started sprouting.

I have no extra lighting to give them. I have moved them around to find the sunniest spot that I can protect them from the dog. Or, rather, protect the dog from the potatoes. Which is in the office. It has a western facing window. That’s it. This brings up an important point.

POTATOES ARE POISONOUS TO DOGS! IF YOUR GOING TO TRY THIS, MAKE SURE YOU CAN KEEP YOUR POOCH FROM EATING THE PLANTS!!

You can see in the pictures, the black mesh. That worked until the plants start growing through it. You could adjust the mesh if you need too. It is working so far.

So, Growing potatoes indoors in the winter from here?….

Bloom or not, they should be ready for harvest around the first of May. I didn’t fill the pots full when I planted them originally. Now it’s the beginning of March, and I filled the top 4-6 inches of the planter with soil. Just soil that I had around mixed with some less than ideal worm compost. (It dried weird and formed little rocks of compost that I can’t crush, so it’s hard to do anything with.)

organic landcare

2024 Update

The yield from the 2022 experiment was less than awe-inspiring.  Only a few spuds. But, I realize now what I did wrong. I didn’t “hill” them up.

In the 2023 garden (picture above), I learned that potatoes do not mine, like carrots or other root crops. If the ground is the least bit hard, the tubers will just grow in whatever ground was loosened for the planting.  Or, just below the soil level and get sunburned. Hence, why potato farmers hill their crops. Or at least in gardens they do.

So, in the 2023 attempt to grow potatoes indoors in the winter, I started with a lower container and filled it with soil as the plants grew.  Once the first container was full, I cut the bottom out of another container and stacked them. I continue to do that, trying not to bury more than 6″ or 8″ of the plant at a time. But I think there were a couple of instances where a solid foot got buried. They grow fast.

Although it’s the middle of March, and they have a couple of months left before I dump them out.  I can already tell you a couple of things I will do differently next year. Every year, we learn, right?

Have the soil and containers ready beforehand. Half my issues with this method is trying to find containers to cut the bottom out of, and all my soil is frozen solid.  Luckily, I kept these pots from trees and shrubs I planted this summer, and garden soil is cheap in January. But, I will be better prepared next year.

The other thing is I am concerned that the water is not reaching the middle of the stack. I can water from the top and bottom, but next year, I will install some sort of watering column that I can get water through the whole stack of pots. We will see what happens in May when I dump them out, but I think that will be better.Which brings me to another point.

If I dump these things out in the office, where they are. It’s gonna make a mess. So I need to have a dolly or something to get them outside. I should have thought of that before. Oh well,that’s May’s problem.

Right now, they are easily 4 feet tall, so I think stability will be an issue before May’s harvest.

I will let you know how it goes.

Posted on

Wood Ash – The Original Ice Melt

Wood Ash – The Original Ice Melt

Wood Ash – The Original Ice Melt. I would hesitate to say, without doing any real research, that ashes from a wood fire would have probably been the first thing used by people living in winter conditions, to add traction to icy spots. To quicken the melting process as well. But, like I said, I haven’t done any real research to back that up. Call it a hunch.

Wood Ash - The Original Ice Melt

Wood Ashes Today

Probably the biggest factor in the decline of using ashes for ice-melt, is that most people no longer have readily available wood ash. Growing up in New Brunswick we used it all the time, mainly because we had wood ash. Wood was our main heat source. Now, in Alberta, natural gas is our main heat source (for now). We have a fire place in the house mainly for ambiance, and one outside for basically the same reason. This gives us a little ash surplus that we can use in the garden.

Wood Ash – The Original Ice Melt Zone 4

If you live in zone 4 like I do. Or, any zone below that. Then your garden is probably frozen for a good part of the year. Which sucks I know. Because, the above and below pictures show the same stretch of sidewalk.

Wood Ash - The Original Ice Melt

With the freeze/thaw cycle we get here in winter, caused by chinooks, la nina years, and just topography, the ice can get built up on hard surfaces like sidewalks. You could go and get “Ice-Melt” from the store, and I do. There are options out there that are less harmful than others, but they are mostly by-products of some other chemical process. Year after year, I replace sections of lawns and gardens people have killed by adding ice melt on the sidewalk, and then shoveling it onto their property on the next snowfall.

Wood Ash – The Original Ice Melt

When I clean out the stove or fireplace I collect the ashes and try my best to screen any sharp things out. I use a lot of waste from the wood shop as fuel in the outside stove. Though not pressure treated wood, it will often will have nails and staples left in it. If you only burn virgin wood then you don’t really have to worry about this. Though it is still a good idea to sift through it, especially if your putting it on a public sidewalk.

Wood Ash - The Original Ice Melt

Things To Remember About Wood Ash

Here are a few other things to keep in mind .

Don’t use contaminated wood ashes, or ashes from pressure treated wood.

Screen/Sift the ashes first.

Wear gloves

Pay attention to wind direction and stay down wind.

A little bit goes a long way.

Posted on

Wicking Beds With Greenhouse Tops

Wicking Beds With Greenhouse Tops

Wicking Beds With Greenhouse Tops – In Permaculture, they teach about zones, and realizing where things should be to make your life easier. In order to make this small space big, we need to utilize every inch of space, and everything has to serve more than 1 purpose. Another principle of Permaculture is stacking functions. These beds will double as firewood shelter. By the back door, for those cold winter days, when you don’t want to go far to get more wood. We will plant in them things that we use a lot of in the summer. Things that are cold hardy for the shoulder seasons, under the cold-frames. I do not think that these will allow for 4 season growing, but one never knows from season to season. They will definitely extend the growing season greatly.

Wicking Beds With Greenhouse Tops – Part of Our Urban Homestead Project

These raised beds are the wicking beds in the “Wicking Beds Piped Together” page. There is a full description of the build of the garden beds there. For the covers, greenhouses, cold-frames, whatever you want to call them. Here is how I constructed them at a very low cost.

Being flexible with the design

Being flexible with the design is key to the low cost build. The original idea was to build all of the back walls with 2 x 6’s. Well, I forgot how low my supply of 2 x 6’s was. So, the first one (in the first picture above) is built from 2 X 6’s. The rest are planks on a plywood backing.

Wicking Beds With Greenhouse Tops

Less thermal mass, sure, but I have pallet wood. I have the piece of MDF or whatever you call this stuff. Chip board, flake board, plywood. It will work. Right now the gardens are open to the elements so, good, better, best. I have plans to paint the wood, and add some dark rocks for heat exchange. So, this is just another step.

Wicking Beds With Greenhouse Tops

Thinking About Positioning

These are going to face South and sit against the house. Therefore, the back (North) wall of the greenhouse is solid. As is the East wall. To catch the afternoon Sun’s heat. Angles are not my strong suite, so I kept the lid angle at a 45 degrees, to keep it easy. Total back wall height is 19″. The front wall ends up about 7″.

Wicking beds with Greenhouse Tops

The West, and South side will get the most Sun, and those sides will get a clear plastic covering. For this side wall, I just framed in a similar shape as the 2 x 6 wall. This is where the 45 degree angle comes in handy. The beds are 12″ across, so that’s the width (or length depending on which piece your talking about) of the bottom piece.

The front is a basic connecting piece. Nothing fancy here. I had to use 2 pieces to make the length. Ideally 1 piece would be a nicer finish, but again, I’m flexible with the design.

The hinges are nice, but not 100% necessary, I guess. I have hinges from previous projects, so we’re going to put them on.

There is foam ends designed for this type of roof. But, I couldn’t find any around me. I carved the pattern out of foam for a metal corrugated roof. The plastic ends available for these roofs are not good, in my opinion. Making these foam ends didn’t take too long, so I still recommend the foam. It’s the draft I am trying to stop as much as I can. Keep the warm air in.

Wicking beds with Greenhouse Tops

Wicking Beds With Greenhouse Top Needs A Top

For the lid, it’s a square frame. Pre-drilling the screw holes makes this part much easier. Pallet wood tends to be dry and beat up. Making it prone to cracking. The plastic top will help make this sturdy. The screws holding the plastic were not pre-drilled because they are not deep. There is just a lot of them.

To ensure there is a good seal around the lid, weather stripping was installed. The lids are not air tight, but the limit of cold air coming in is key. Especially to extend the season as long s possible.

Wicking beds with Greenhouse Tops

The corrugated plastic roofing came from a previous project. I have stored it for literally 10 years waiting to use it like this! I cut it to length so water is allowed to run off the roof over the front edge. There will be plants in the ground in front of these beds eventually. Those plants can have that water. These beds will be fed with water from the downspout. Just the final hook up to the downspout, some trim work, and paint to be done in the Spring. Good to go.

Posted on

Changing How We Look At Plants

nectar providing plants spring  Changing How We Look At Plants

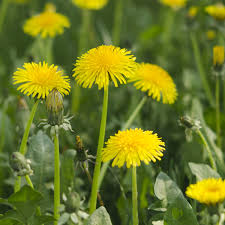
Changing How We Look At Plants – People often scoff at me when I ask them why they hate the Dandelions (Taraxacum) so much. The most common reason is just that they are everywhere. Most people still want a green carpet of lawn, or a garden with no “weeds”.

I try to enlighten them about how the first Europeans brought the Dandelion here as an herb in their gardens. How every part is edible and quite good for you actually. By this point they are usually laughing out loud at me.

forehead scratcher guy

Even if they get it, they still want them out of their lawns. Are dandelions going anywhere? Not anytime soon. Not that long ago they were the most hated plant in the city. Now, with some education, there is a growing appreciation for the first flowers to come out in the city. The first food source for early pollinators, a group the Dandelion is a part of. The elimination of the Dandelion now, would be very detrimental to early urban pollinators.

Yet, it is still a billion dollar industry.

What I have learned about many of these pioneering plants, is they grow in Calcium deficient soils. Compacted soils, and/or degraded soils. The dandelion especially. So my approach has been, (thanks to things I have learned through Gaia college) to improve the Calcium level in the soil. Through natural amendments. Understanding that everything needs to be in a balance, so not just adding straight Calcium.

Changing How We Look At Plants

Changing How We Look At Plants

My belief is that if we help the pioneering plants do their job, then they can move along. Pioneer somewhere else.

In an urban setting, there is no going back to a “native” landscape. Even if we wanted to demolish all the buildings and tear up the roads, the Earth has changed. The natural settings around have changed. The weather patterns have changed. So, that is not an option. But, I’m not suggesting we throw in the towel on the whole thing just yet.

Plants are just plants. They have no malice towards us, as far as we can tell anyway. They don’t see our political borders. Nor garden signs that say what is supposed to grow in a certain spot either. If the conditions are right, the seed will sprout. If the conditions remain good, a population will flourish. Instead of being mad at the plants “invading”, we should be mad at the people that allowed the conditions of the land to become so degraded. Mother Nature had to call in some pioneering species of plants to fix the damage caused. Bad human!

In residential urban gardens, the biggest threat to local ecosystems is seeds of non-native plants dispersed by the wind and animals. Along with the chemicals used to control them once they are established. Chemicals aside, the seed dispersal itself is not really the issue. It is when those seeds hit a place with the right conditions to sprout and flourish, and its not where we want it to grow. If the seeds are just “kind of” non-native, meaning they are native to an area not that far away, its not so bad.

Like the migration of many plants over time (Neo-natives).

If the seeds are really not native whatsoever, only from a similar latitude if that, that can be bad. For both the native fauna, and the “alien” plant. Having said that, if the “alien” plant is that foreign, the likely hood of it finding that perfect spot on it’s own is small.

If we import plants from other parts of our own continent (especially imports travelling toward the poles), that might not be as bad as importing a plant from the other side of the planet. We may be helping an insect that has moved in preemptively by giving it a much needed food source. Making that insect available as food for a song bird perhaps. The plant could be filling in as a food source for an existing animal loosing a traditional food source that is migrating north. Therefore possibly changing genetically, faster than the animal can keep up.

Plants could be the Earths’ method of communicating with us.

Changing How We Look At Plants

Changing How We Look At Plants – If only certain plants will grow in a certain place. Then perhaps, when a “non-native” plant shows up and “takes over” an area. An overused field, or a forestry cut-block for example. Maybe it’s Mother Earth finally finding the words to say something. The Earth knows there is a build up of a certain element, mineral, or something in one area. It could be useful in another area, but there is no way of getting it there. We may see it as a bunch of seeds just happened to land somewhere.

Actually, the wind was intentional, the seed placement was exactly where it was needed. This new plant, the “weed”, the “alien”, or the “invasive plant”, is the Earth shouting to the biology around. “Finally I have a way to transport this (whatever it is). Come and get it!!”. It is just spoken in a language we cannot hear.

Mother Earth is not talking to us. (can you blame her).

And, the Earth is not on the same clock as we are. 1000 years is a heartbeat. So we can help her by understanding what plants could help. Planting a species of plant from say 300 km away, that is used to a more dry climate, to make up for one, of a similar but different species, that grew in a wetland that is no longer there, could be helpful. Filling that former wetland with asphalt and then planting trees from the other side of the planet is like feeding a patient a poison apple.

Changing How We Look At Plants – I’m not sure the answer.

EMS logos

Going forward though, I think the answer is we need to think about what we are planting. Where it is from genetically, and not define local as just how far the greenhouse is from the garden. Stop imports of plants from the other side of the Earth all together. Even if they are native plants here and grown there for sale here. It’s too far, and we cannot stop the microbiology from coming and going with the plants. In any non-chemical heavy way at least. We should also make it easier for people to find local alternatives for shape and colour of flower. What most people are concerned with. Maybe make it a standard that a certain percentage of your garden space has to be native species. I’m thinking 90%, but that’s me.

Cutting down and removing large, established invasive plants and groups of plants or trees, should also be done with the same careful thought process. It may not be the right answer. It may be better let them live out their life, not let them reproduce. Do better going forward by replacing them with the proper native plant for the location once they die.

SOUL logo Organic Urban Land Care  Changing How We Look At Plants
Posted on

Indoor Winter Composting With Worms

Indoor Winter Composing With Worms

Indoor winter composting with worms can be fun and easy. Especially if you have kids that are into crawly things, gardening, or the general health of the planet. If you check out the website, or have been following along with the journey at all, you’ll know we have a few worm composting bins. I think we maxed out at 6 at one point, but right now we have 3 on the go. 2 wooden, migration style bins, and one plastic, regular 1 compartment style, bin.

A third style pictured here. The one with the 2 grey lids. A two layer system meant to release more liquid. I have had issues with this particular bin configuration. So, it gets used when one of the other bins is too wet. I can transfer the compost into that one, to drain out a bit, if needed.

The wooden bins are made out of repurposed wood.

One is framed in with small lumber I had at the time, and finished with some laminate hardwood flooring scraps. They came left over from the floor renovations, at the old condo. The larger bin, is made from a cedar walkway I was contracted to remove after the 2013 flood. To be honest, I’m not even sure it was originally from the property I removed it from. But never the less, here it is.

There are other pages about the bins specifically, and a YouTube video on how to build one of your own.

indoor winter composting with worms

The Feeding

In the pictures below, the side with the shredded paper is the side I am “feeding”. The side without paper is the side that I am trying to harvest. The paper acts as a secondary defense against fruit flies. So, as long as I don’t allow food scraps to sit on the surface of the finished compost. I don’t usually have an issue with them.

Worm Composting Bins  indoor winter composting with worms
indoor winter composting with worms

The plastic bin and the small wooden bin, have come with me on a few occasions, to speak with school groups about compost and nutrient cycling, decomposition, that sort of thing. (The plastic bins are also available for rent)

indoor winter composting with worms

Found a group of them!! A happy little clew.

Indoor Winter Composting With Worms – The Finished Product

indoor winter composting with worms

After the worms have “all” moved over to the other side of the screen. Where the buffet is. Then I can collect the mostly worm free compost on the other side, and start the drying process. There are always some straggler worms after the harvest, so I have a container with me whenever I stir it around. I’ll pick out the ones I see and place them back in the nearest bin. The new ones are so small, you just have to accept the fact that you can’t save them all.

The Drying Process

The compost dries for a few days to a few weeks, depending on the batch. After that, I start the screening process. I am working on a process so I can offer my compost to clients and at markets. For the average gardener, this step isn’t really necessary. Though if you are adding it to house plants, this might be a good idea. Just to get some easy to work with, and aesthetically pleasing material. Any sort of screen that will be strong enough to push a little through will work. I have used a dish drying rack before. It was about 1/8″ and it worked. Not for large amounts, but again, for the average gardener, in a pinch.

indoor winter composting with worms

After the screening process, the left over bits go into the big composter outside. I could put them back into a bin, but there are some thicker stems from squash and the like in there, so it can go in the big one. I don’t want to sift it out again. Indoor winter composting with worms, fun.

Everything back in it’s place. I’ll come back to them in a couple of weeks. I only fed one bin, because I am going to block access to it to try out my pottery wheel.

Wait, what??

I’ll collect more food scraps in the meantime.

Check out the rest of the website for more!! Contact me with any questions, or if you have a group that would like a demonstration.

Posted on

Plant Relatives

Plant relatives

We are not that far from being plants

Plant relatives can mean a lot of things. What I am talking about is the thought, or theory, that we are just plants with more complex emotions. Sounds funny I know. But, when you think about it, and learn more about how plants interact with their environment. We can draw some pretty similar comparisons.

No feelings

Plant relatives

Before I start in on this, I need to point out one thing. I am talking about humans as an organism. On an ecological level. Nature doesn’t really have feelings. If it’s our time to “feed the soil”, Mother Nature deems us just another pile of organic matter, in need of some decomposers to start the process.

Plant relatives – Offspring

Its not news that plants have offspring. Research has shown though, that many plants can recognize their own offspring over plants in the area, even of the same species. They will favour those plants over others.

Plant relatives

They (plants) also communicate with some other organisms (bees, as obvious example) outside their immediate family (or species), more than others. When something new is added to the garden, it takes some time for the flowers, roots and leaves to form relationships with the surrounding beings in the garden. The more foreign the origin of the new addition, the more time it takes to form those relationships, in the new garden. But, over time, most things (plants in the garden) will form relationships with at least some neighbours (insects, bacteria, fungi, other plants, etc.,) in the garden. And sometimes, more often than one might think actually, there is never a “good” relationship with the new addition to the garden. (Think misplaced plants, like trying to plant a cactus by a swamp). This sounds pretty similar to when someone new moves into the neighbourhood, doesn’t it?

Plant relatives – Things out to get ya!

As humans, most of us do not have to deal with predatory animals like lions and snakes. Most of us. For the vast majority, the “humanivores” are much smaller, microscopic in most cases. Why? Perhaps because Mother Nature knows the best attack is the one they cant see coming. We can guard against big cats. Bacteria and viruses are a little harder. They are Mother Nature’s population control for us.

Our plant relatives have to deal with diseases, bacteria, and viruses. In the garden, the damaging entities, be they insect, bacteria, or anything else, always go after the weak, sick, and old plants first. In the “human garden”. The same is true. Like it or not these things attack us the same way as a field of grass, or a tree orchard. They are Mother Natures way of keeping our population in check. We have tried, and continue to try, everything in our power to fight these things off. We are even sending messages in to space, to other humans outside of our garden (Earth) asking for help. Plants will send signals asking for help from neighboring allies. They are hoping help is out there, just like we are.

Helping our plant relatives & Helping ourselves

If you want your plants to avoid the attacks of herbivorous organisms, then you must keep your plants healthy. Not with chemically artificial fertilizers. With the everyday, nutrients and minerals that are available, for free, in the soil. Healthy soil that is. Soil that you are adding organic matter too in the form of compost, or plant matter for the native microorganisms to then convert to compost for you, in the garden. If our plants do not get the adequate water, sunlight and a steady supply of all the nutrients they need. They will not be able to fight off the herbivorous bacteria that just landed on it. Also, without the relationships to the neighboring organisms, the fight is much harder for the plant as well. Sort of like your neighbor bringing you some chicken soup, when they know your sick.

If we want our humans to avoid “humanivorous” organisms, then we must keep our humans healthy. Not with chemically artificial “fertilizers”. With everyday, nutrients and minerals that are available, for free, in the soil. Healthy soil that is. Sound familiar yet? We are not that different.

Plant relatives – Mother

If we could possibly trace our lineages as beings on the Earth. Both us and plants. And, yes there are people working on it. We will see, we all come from the same Mother. Mother Earth. We come from the soil. We take in our nutrients from the soil our whole lives, rather you realize it or not. Then, when we die, we return to the soil. The only real difference between us and plants is that we can walk around. We have more in common than different. Click the pictures below for more information.

organic landcare
SOUL logo Organic Urban Land Care
Posted on

Grounding / Earthing – Literally Our Connection

Grounding / Earthing is literally our connection to the Earth

I Had An Epiphany!

surprised worm

The other night I watched a film about Grounding, or Earthing, that made me realize something.

Since I started down the path of Organic Urban Land Care (and kind of the reason I started in the first place). I have noticed that the people that tend to their garden with a more natural (dare I say organic) mentality, seem to be the ones that enjoy their time working in the garden. They are also the more “laid back” population of gardeners and land care people, it would seem.

I used to attribute this to just personality differences. Then I thought it was chemicals absorbed from traditional landscape practices that made some people uptight, and worried about the bottom line. Because of the money they spent of the chemicals no doubt. Now I think the difference is grounding.

I have also noticed in my own experience. The days that I feel achy and sore, but spend some time in the garden. I improve quickly. When I am walking on grass or soil, my back doesn’t hurt nearly as much as when I’m on concrete or asphalt. I have always been a barefoot walker, and big proponent of it. My kids are often barefoot, and not because I have told them too. They just do it. I thought it was the fresh air, my country upbringing, maybe some acupressure. Now I’m wondering…

grounding / earthing

There has been a Grounding / Earthing Disconnect

2 really.

I have trying to figure out what is the ONE thing that connects us all in the importance of organic urban land care.

Some people do not want to grow their own food.

And, some people do not want to plant all native plants.

Some people are deathly allergic to bees, or generally hate bugs, no matter how important they know they are to the ecosystem and the planet.

grounding / earthing

A great population live in high rise apartments in downtowns.

And so on.

The second disconnection is between us and the planet. Literally, our connection..

rock mulch garden

Our cells are held together by electromagnetic forces. Elements and particles pass from one thing to another by positive and negative forces. The synapses in our brain, and our heart beat. Controlled by electrical pulses. These pulses and electrical reactions all need to be grounded. Just like a television set or computer screen. If it’s not properly grounded it will work, but it will have static. In our bodies, that static is in the form of inflammation. That can cause all sorts of other health issues, if left unchecked.

I’ll only mention the cell phones, Wi-Fi, radio waves, and the Earths own electromagnetic properties that we are surrounded by everyday. We are bombarded with charged particles constantly.

Traditionally Grounding / Earthing would happen naturally.

In order to rid yourself of those extra electrons, you need to be in direct contact with the Earth. Something we are surprisingly, not doing enough of. Or at least, get rid of the electrical insulation between our body and the Earth. Rubber soles, as an example, insulate us electrically from the Earth as we walk. The easiest way to become grounded is to walk barefoot on the ground. On a regular basis. Hang out on the grass. On a regular basis.

The Grounding / Earthing – Organic Urban Land Care Connection

Where the importance of Organic / Regenerative Urban Land Care practices comes into the picture is when we consider our feet. The soles of our feet (and palms of our hands) do not produce the waxy protective coating of sebum the rest of our skin does. So, as our extra electrons are draining, we are absorbing things through our feet. This is what keeps most people from walking barefoot I think. If we didn’t have to worry about the chemicals being absorbed, we could focus on the energy transfer happening.

organic landcare

So no matter who, or where.

Grounding / Earthing is something we all need to do. And, we need to be able to do it in an environment that we only absorb good things through our skin.

New Online Learning Opportunity

Contact me or check out the front page of the website for the new online learning opportunities. I will explain the importance of organic urban land care. And, go through the seasons with tips and ideas for what we can do to bring balance back to the garden.

Posted on

Build Your Own Worm Composting Bin in 5 Steps

Worm Bin Rental

Supplies You Will Need:

Build your own worm composting bin in 5 steps

Build Your Own Worm Composting Bin In 5 Steps.

Large Durable Plastic Bin.

Size will depend on your needs. The first one above is 75 Liters. The second one is 55 Liters.

Window screening.

I keep the old stuff when I replace a window screen on the house.

Vents.

I recommend vents meant for building fascia, available at most hardware stores. Different sizes are available. 2″ – 2.5″ are what I use.

Cutting board

Scissors or utility-knife

Hot glue gun

Drill and appropriate bit size for vents.

Build Your Own Worm Composting Bin in 5 Steps

Step 1 – Cut The Screening For The Vents

The easiest way I have found to do this is to lay the screening on a cutting board, and use the vent as a guide. Either with a sharp scissor blade, or a utility knife, cut around the vent. Don’t use the good scissors. This will dull the blade in a hurry. They don’t have to be perfect, but the closer they are to a circle, the better for gluing.

Step 2 – Add Screening To The Vents

The vents are added for air flow, temperature and moisture control. The screening is to keep what is in the bin, in the bin. And, to keep things out of the bin, as well. When the light is on, everything wants to hide. When it’s dark, little beings like to wander, or wiggle, or slither as the case may be.

I like to use a BBQ skewer, or toothpick, to help center the screen inside the vent. It helps to set the glue as well. I have used silicon in the past, but a hot glue gun works about the best. There is a trick to it, so take your time with the first one. The good and bad thing about hot glue is the set up time is quick.

The main goal being to keep the worms in. They don’t really care what their windows looks like.

Build your own worm composting bin in 5 steps

Step 3 – Measure location for the vents

Uber important step here. You want the vents somewhere above the half way mark on the bin. Too high may not get the air flow needed at the bottom when the bin is less full. Too low and the vents could be blocked by compost and, that’s bad for a few reasons. No air flow and a place for any excess moisture to escape.

Be sure to take into account the lip on the vent and the lip on the bin (if any). I forgot in the pictures below. I had to trim the vent. No big deal. Just learn from my mistake. Measure twice and cut once. Oi.

Step 4 – Drill holes for vents

Build your own worm composting bin in 5 steps

This is the only special piece of gear you’ll need. A hole saw drill bit, like the one attached to drill above, the same size as the small end of the vents. The tight the fit the better. Individually, they are not very expensive at the local hardware store, but there is an alternative. If you have normal, small drill bits.

Place the vent where you want it, and carefully trace out the circle again. With a small drill bit, drill a series of holes on the inside of the circle you just drew on the bin. Be careful that the outside of the bit barely, if at all, touches the line. Once you have done that around the whole circle, use the utility knife to finish the job and cut out the circle.

Step 5 – Install The Vents

Build your own worm composting bin in 5 steps

Depending on how tight the holes are to the vents, you may want to apply some hot glue around the back of the lip of the vent. Then just push them in, and your done.

Vents can be added to the lid as well. Depending on where you place your bin, and how active it gets, you can always add some later, using these same steps.

Build your Own Worm Composting Bin In 5 Steps

That’s it. Ready for worms. Visit the Worm Composting page for more info to take you from here.

Or you can always Contact Me for more info.

Posted on

Organic Lawn Rejuvenations

Before
After

Organic Lawn Rejuvenations

Every year, at some point in the spring or summer, the doorbell will ring, and someone from a lawn “care” company will be there offering a “safe, simple, & inexpensive” chemical spray application program for your lawn. They will come multiple times a year to fertilize your grass, and kill whatever isn’t grass. Then, tell you it is the only way to keep your grass green.

What they don’t tell you is…

Chemical sprays lead to deteriorating soil conditions, which leads to more sprays and more expenses over time. An organic lawn requires less work and less expenses over time.

There is another way. A way that does not include chemicals. Here is how it works.

Organic Lawn Rejuvenations*

*Prices based on the average urban property. Watering can be completed as extra

Organic Lawn Rejuvenations

Step 1 Initial Unwanted Vegetation Removal

As an initial step. Any large unwanted plants like dandelions, lambs quarters, and the like are removed by hand.

Charged at $55.00 per hour per person. Capped at 2 hours unless otherwise agreed ahead of visit. (For larger or more hurting lawns)

Step 2 Core Aeration (if required)

Starting at $75.00. Recommended for only the most compacted areas, & prior to compost application. Completed by hand except for very large areas where a mechanical option may be more efficient.

Step 3 Organic Compost Top Dress

$120.00 per half yard. Organic, aged, weed-free compost, delivered. 1 half yard is usually enough for the average urban property.

Organic Lawn Rejuvenations

Step 4 Overseed Lawn Areas

Starting at $40.00. Specially selected grass seed for the area required. (sun/shade/high traffic etc.,).

Organic Lawn Rejuvenations

Organic Lawn Rejuvenations follow-up steps.

Step 5 3 Compost Tea Applications

$120 total. Application dates will depend on the time of year and the progress of lawn.

Organic Lawn Rejuvenations

Step 6 3 mos. Monthly Unwanted Vegetation Removal

$150.00 total. 3 monthly follow up visits in order to remove unwanted vegetation that persists and check on progress.

Organic Lawn Rejuvenations

Full Package – $615.00 (2 hours initial plant removal, and aeration options included)

Custom packages available. Contact me for a free consultation and assessment.