The Bokashi Set-up..
The Bokashi set-up begins!. Bokashi bran compost accelerator came in the mail today. I am very excited to document my experiment with Bokashi. The goal is zero food waste. The worm compost is awesome, but the Bokashi should fill in the gaps where the worms fall short. (Sorry worms…)
The Bokashi:
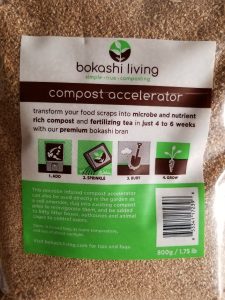
I chose to go with Bokashi Living for my bran. Purchased online, because I was having a hard time finding it close to me. I can get it in Calgary, but that is a drive, and online it came to my door. Also, I found that they have “how-to” videos on their website. I only watched a couple of the poignant ones for now, but they were super helpful so check them out. Their are special buckets for bokashi, but I have a few spare buckets in the shop that are clean, so I’m going to use them. Hopefully, I don’t regret this decision later.
The Container:

One thing to always keep in mind when dealing with anything that will eventually touch your food. My pails are food grade plastic. This means that there will be less chemicals leaching into your mix. I suppose if I come across something that is not plastic, but sealable, maybe I’ll make the switch, but for now, pails. But , “Food Grade”
Step 1 to the Bokashi set-up:
2 Tablespoons of bokashi bran in the bottom of the pail. Try to get as much coverage as possible.

Step 2:
2-3 inches of food scraps into the pail. Every couple of inches more bran needs to be added. My 2 liter kitchen containers, when full, are about 2-3 inches on the bottom of a 5 gallon pail.

Step 3:
3 more Tablespoons on top of the food scraps. I guess you can add too much, but more is better than less. I started with 3, but I may adjust, and probably will have to adjust, as time goes on.

Step 4:
It’s an anaerobic system, meaning that there is no air. For now I have a thin plastic bag to help keep my hands clean as I try to push as much air out was possible. This first layer didn’t squish much, but that will change as the moisture level increases.

Step 5:
To help keep the air out of the system at the bottom of the pail, I spread the bag out to cover the top of the food scraps. I am going to build a more sturdy plunger, but for now I was too excited to get started, so this will work.

Step 6:
Easy enough. Seal it off until the next batch. This lid is probably a bit aggressive for my needs, but it will come off relatively easy and it does seal, so again, for now, it’ll work.

Step 7:
The worm bins are all down in the shop, but I want to keep an eye, and nose, on this for a while. So It will live at the top of the basement stairs. It’s relatively warm there and dark for the most part so it should do fine, and it’s out of the way.

Summary of the Bokashi set-up:
So that it. Now I have to make the additional kitchen collection as user friendly as possible so that my family will sign on and use it. So far, we have a collection system for the worm food. Check the vermicomposting page for that. This consists of a series of 2 liter containers in rotation. The bokashi requires a dedicated container to keep it simple for the family.
Now, we have the same containers for the worms as always. Anything during the day, that the worms don’t like, goes into the bokashi pail. Then, after supper, the plates, pots and such get scrapped into the bokashi container. Once that is filled, which will probably be every day or two max, I’ll empty it into the actual bokashi pail with 3 or so Tablespoons of bran.
Lets see how it goes!!