A homemade pottery wheel.?! I have wanted to try pottery for some time now. I thought it could be something to eventually supplement my income in the winter. This past year I was introduced, through research of my own, to Olla bowls. Their use in the garden, for underground water storage, has been dated back thousands of years, in dry climates, where water is precious. Here in the foothills of the Canadian Rockies, water has not been an issue in the past. However, every year gets a little drier it seems so I can see more people looking to harvest the rain in the future, which is good.
I was looking for a way to keep a new planting alive at one of clients homes. It was a Potentilla shrub that could be seen from the bedroom window (I think), but the hill of the front lawn made it impossible for my client to get to to water. I couldn’t get there everyday to water one plant, so an Olla bowl was the answer.
Getting a traditional looking Olla bowl for the garden is possible, but like I said, I have been thinking about trying pottery. Why not start with something destined to be buried anyway? Takes some of the pressure off for it to be perfect.
One problem
Pottery equipment is outside of the budget for something that may or may not work out. If I was going to try pottery, I would first have to build the equipment to do it. So I started looking online for how-to videos, and looking at schematics, and what I had in the many “magic boxes” of miscellaneous parts of things I have dismantled over the years, and it kind of just started to come together.
So, below is the description of what I did to build the pottery wheel. The kiln will be on a separate page when It’s done. The total cost of the wheel was about $30, but I have a lot of “magic boxes”. It is totally customizable. I’m tall but not very flexible. You can adjust the height and width to suit you.
Homemade Pottery Wheel The Build
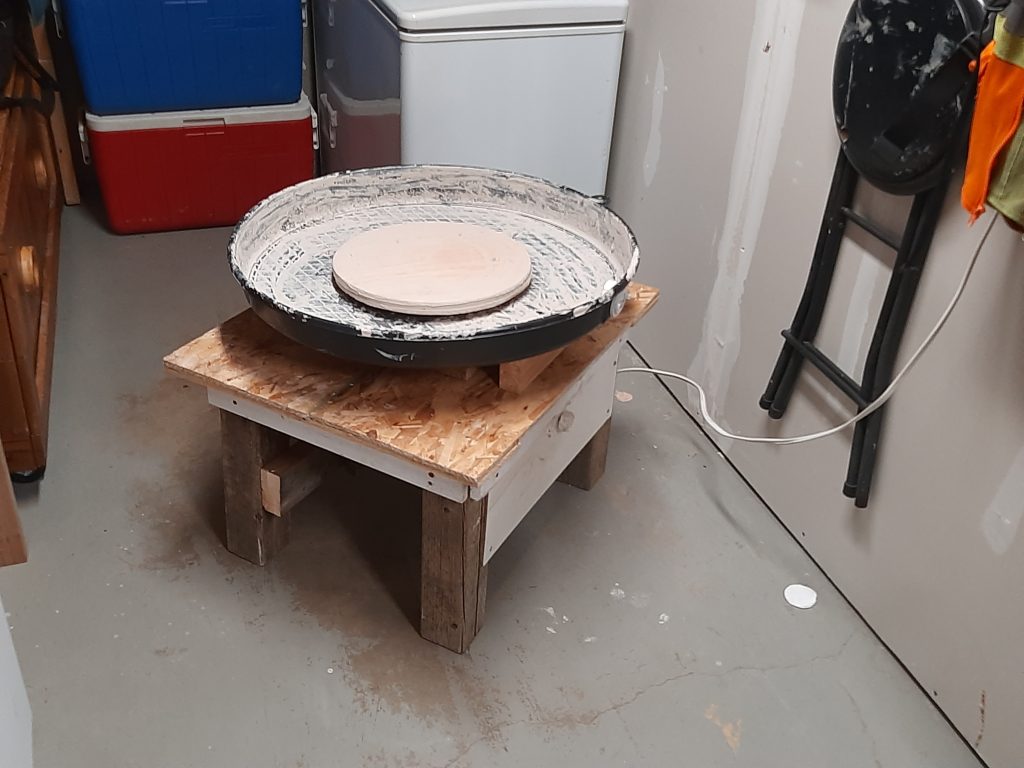
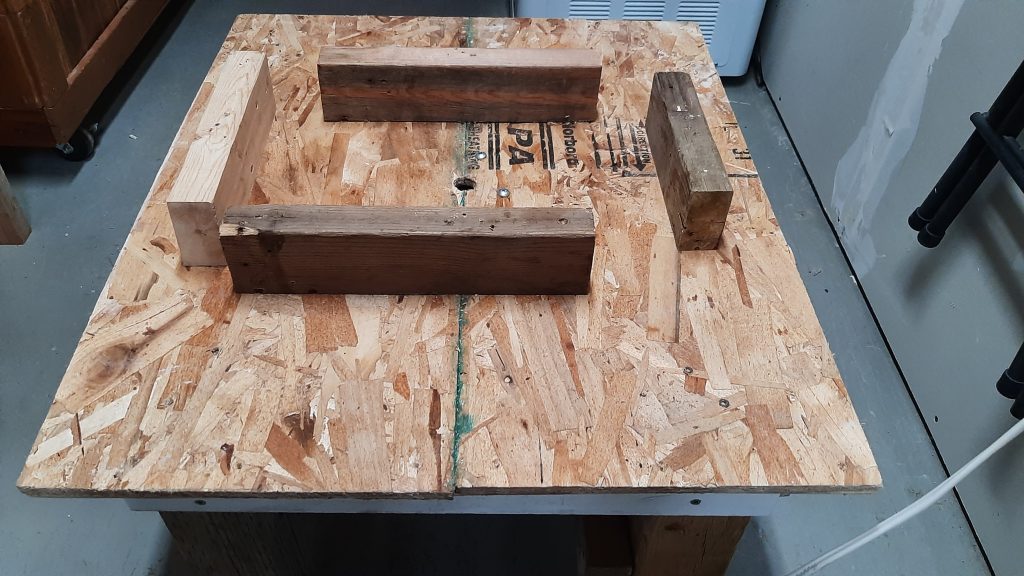
The first thing was to build the table. There is nothing special, at this point, about the build. It’s just a table. 4 legs and a top. As far as measuring, I didn’t. Well, not a lot. The thing is, I often have parts from former builds that either ran through their usefulness, or didn’t work in the first place.
So I had 3 4×4’s the same length and cut a bit off them all 4 so they were even. 28″ comes to mind, but it’s a personal thing, so make it a height that works for you, I guess. The width was the length of 2 pieces of plywood I had that happen to be similar in length and width. I honestly don’t know how wide this thing is. The wheel it self is ~14″ in diameter. The splash pan is 20″. The table is wide enough to support that span with a working edge on the corners. You’ll see what I mean.
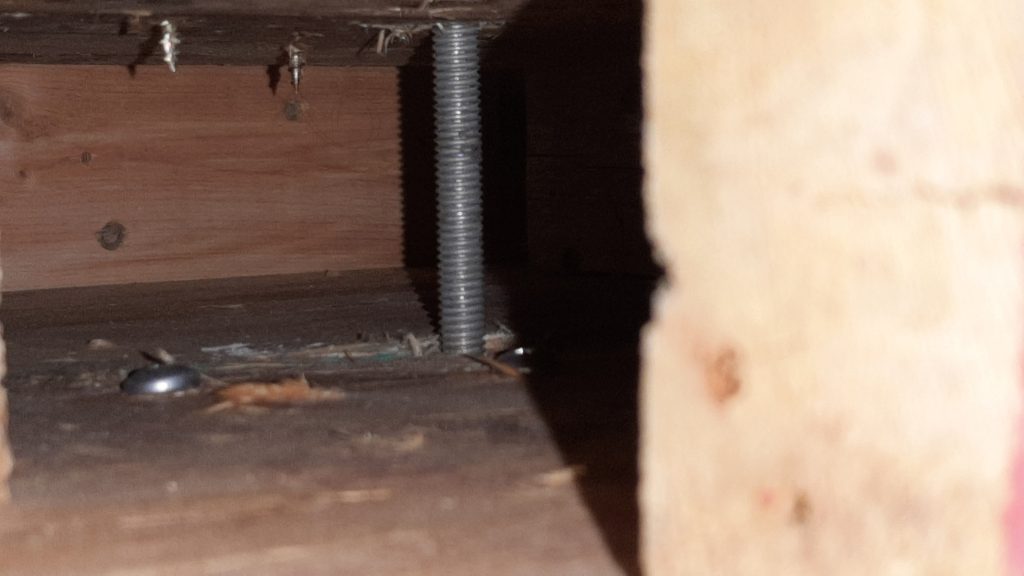
Once the table is built and sturdy, I drilled a hole in the center of the top. I went with a 5/8″ hole because I plan to use a 1/2″ shaft.
Homemade Pottery Wheel Power Supply & Switch
A big thing I learned about these things is that it’s nice to be able to control the speed. I have since learned that a foot pedal is the way to go. I had this dimmer switch, so I used it. Not being too sure this was going to work, I used what I had. I’ll pick up a foot pedal somewhere and replace it, before I get to into this. A piece of 1/4″ wall board works as a mounting surface. A foot pedal is probably a cleaner option as well.
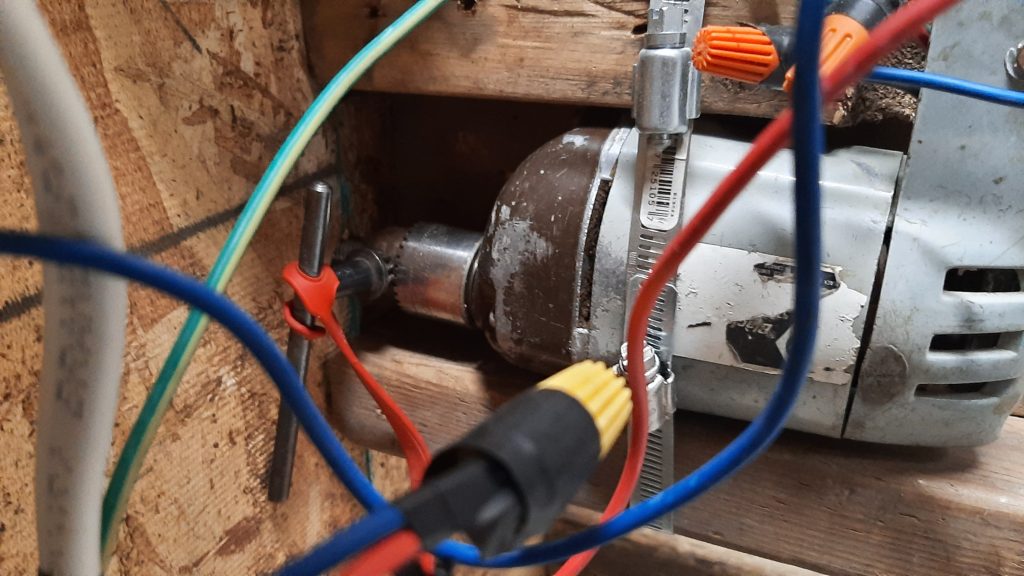
The drill I ended up using as a power supply was given to me, because it didn’t work. The switch was gone, the bearings I fear are not long behind it, but with this design I can replace the drill without too much hassle. I think.
Third times a charm?
The drill is actually my third attempt. The first motor I tried was from a furnace fan. 1/2 horsepower, but it had a slip mechanism built in it. I think to keep the fan from cutting our fingers off, if you were to fall into the blades. For my application, it made the wheel stop turning with the slightest of pressure. No good. The second motor was from the old garage door opener in the garage. The old one replaced before we moved in, was in the rafters of the garage. It worked, but t had a motherboard controlling it that I couldn’t override. Only turning for so long and then stopping. It would start again then, but in the other direction. Again, No good.
The wiring is pretty straight forward
I am not an electrical guy, so I am not going to try to explain how to do this part.
But,…. the black line from the plug wire goes in one end of the switch and out the other, and then into the machine (drill). The white wire from the plug goes directly to the white or red wire of the drill. The green wire or bare wire from the plug attaches to the green or bare wire from the drill (and switch if it’s there).
Make sure there is no bare wire showing at the connections, and the connections are not touching. Just to be safe. The wires should be the same gauge also. If this doesn’t make sense, you should probably pause here and figure that switch part out, then come back. The mounting is next. Like I said, I’m not an electrical guy.
Homemade Pottery Wheel Mounting the Motor
Once you get your motor working and the switch ready to be mounted, welcome back!
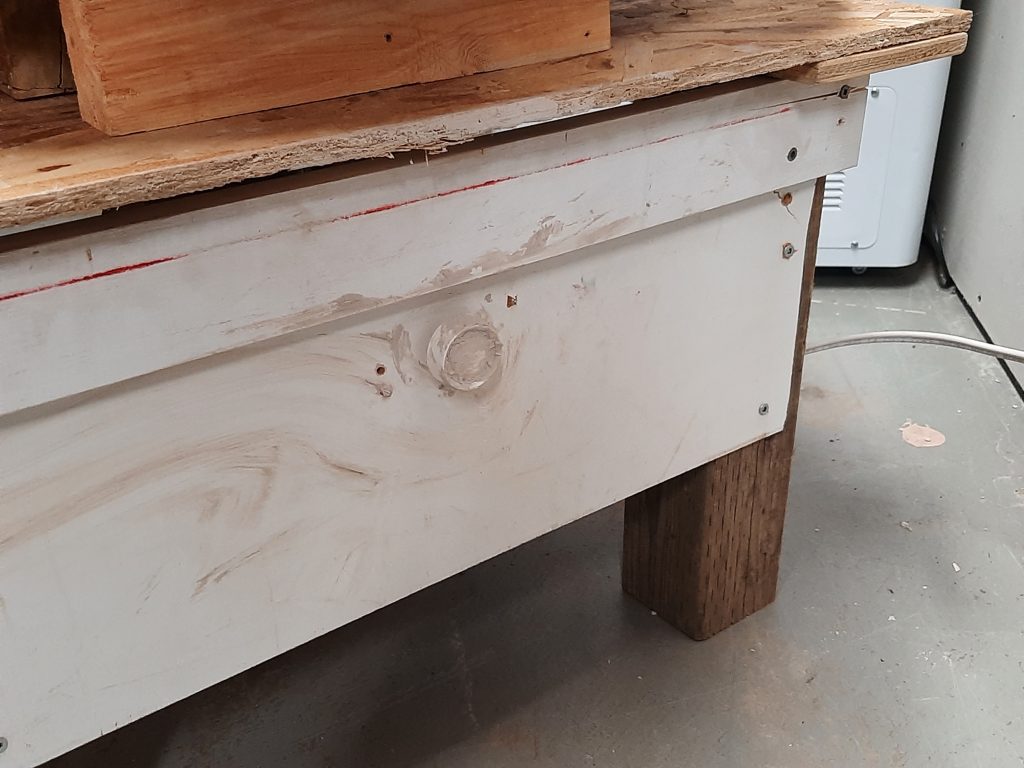
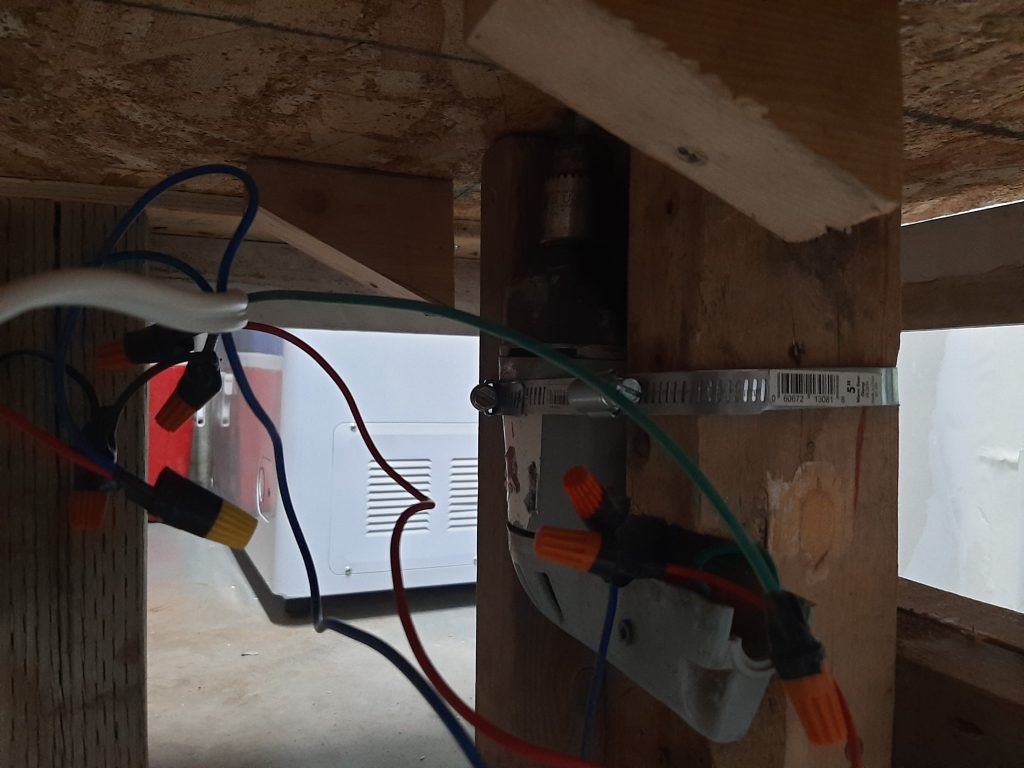
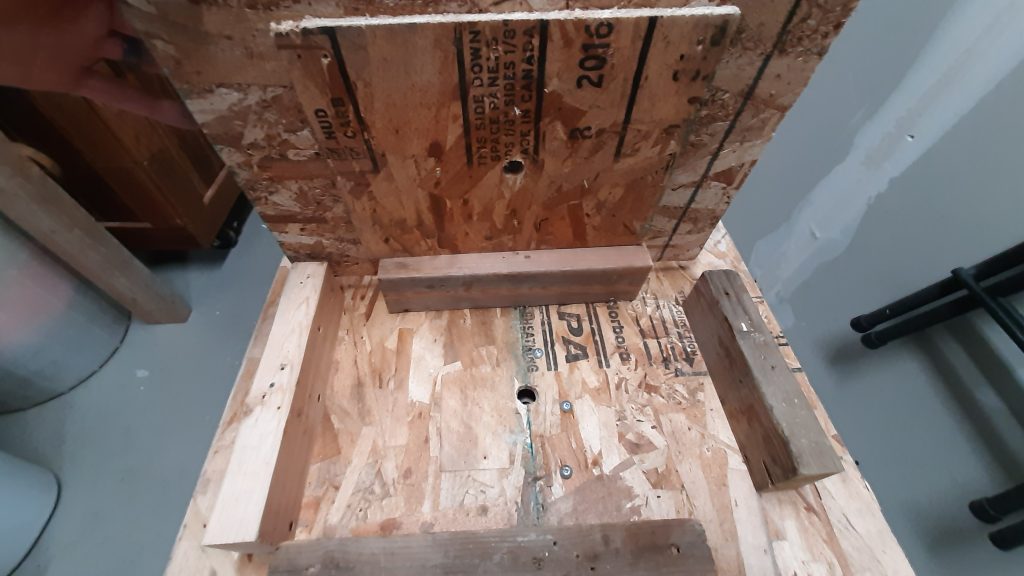
My mounting block for the motor is a bit makeshift, admittedly. I used three chunks of pallet wood 2×4. One has the groove cut into it for the forklift fork. The handle of the drill fit in there so I used it. The 3-sided box design, with the groove for the drill handle that is screwed to it, and the combo screw strap, deal, works. I added a cross member to the legs of the table at this point. It passes by the motor mount and stabilizes the drill.
The big thing to remember is the motor has to be stable. Any little wobble here is a big wobble in the wheel. I learned the hard way. The two angled pieces of wood the the picture below serve no purpose. They were left over from design 1, and were to going to require full dismantling to remove. They are not in the way.
Raised Splash Pan Platform For Stability
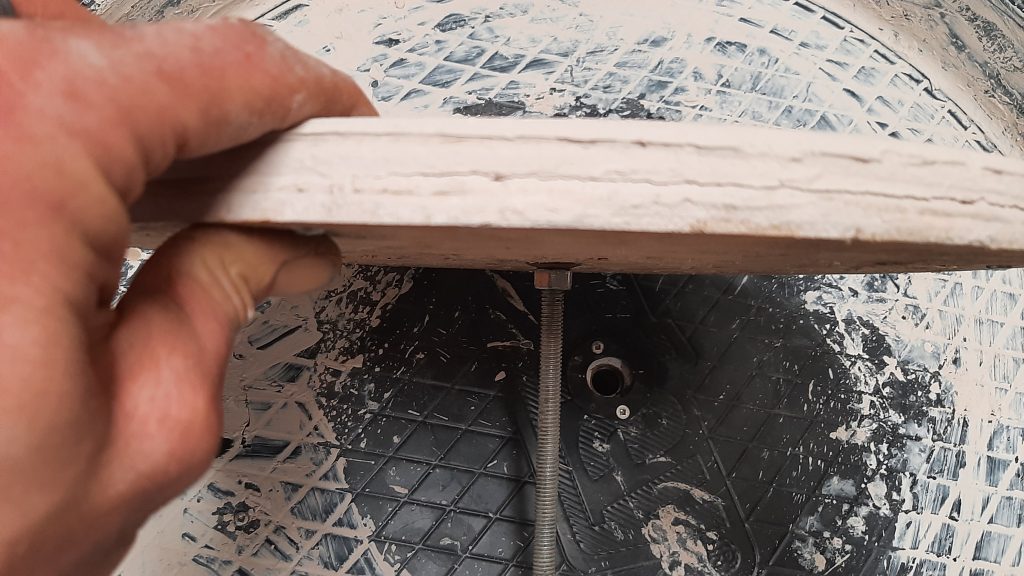
The final turning point should be pretty close to the wheel. I thought putting the bearing right in the table would make the shaft to short. I’m not sure about that, but raising the splash pan up makes sense for me, I’m tall.
I needed a stabilizing bearing for directly under the wheel. The local hardware store had a bearing. I made a saddle/seat for it by drilling a hole the size of the bearing in a piece of plywood. Then, I drilled a smaller hole in 2 other pieces of plywood. The smaller holed plywood pieces connected (sandwiched) to either side of the larger hole keeps the bearing in place and allows things to spin. Not pretty, but it works.
Centering Everything
I found having a spare piece of the shaft your using to turn the wheel, around for this part, to come in handy. The drill, hole through the table top, and hole in the bearing all have to line up. It takes some time, but this part is one of the most important parts. Once you are happy things all line up and are plumb, screw it down.
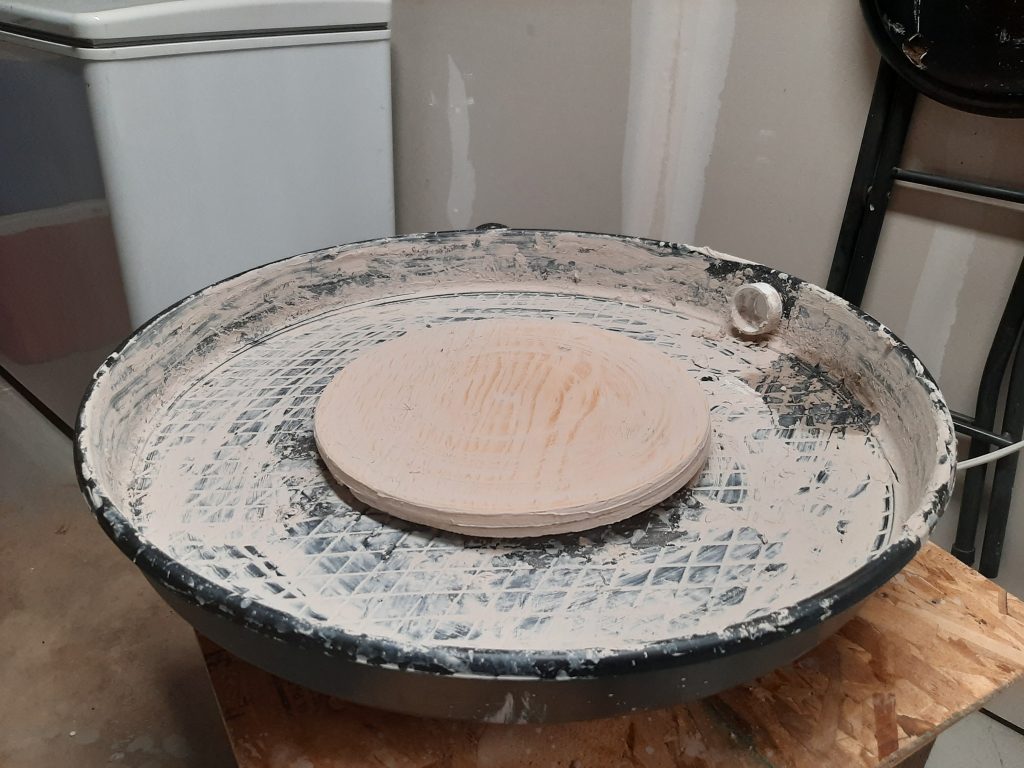
Homemade Pottery Wheel The Splash Pan
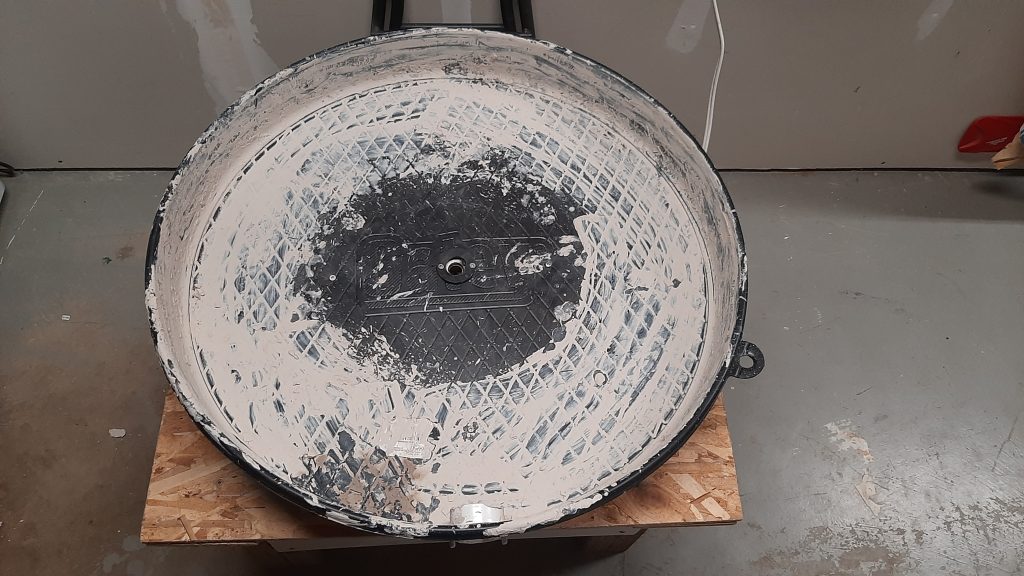
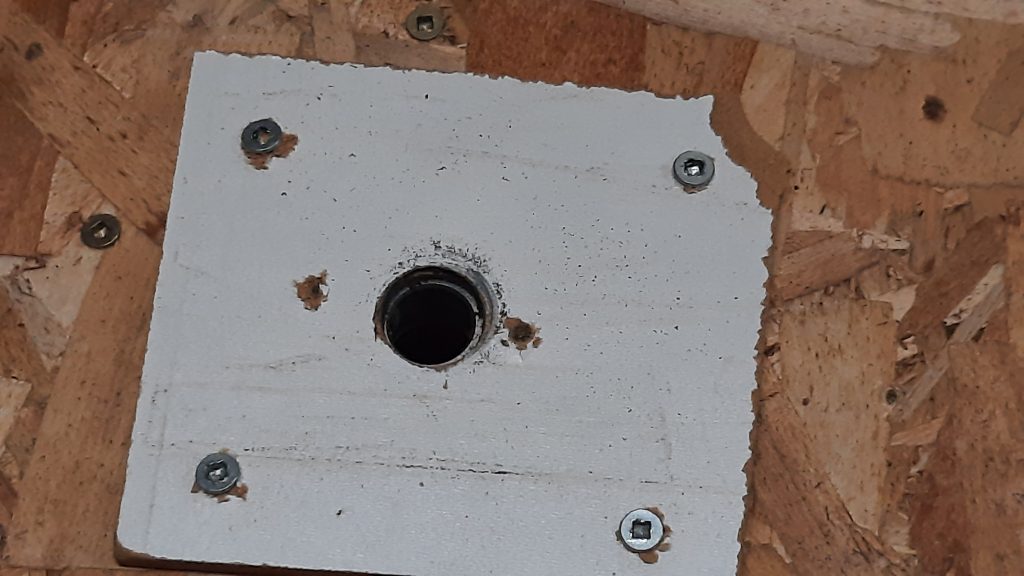
I went with the drip tray for under a hot water heater. This was the majority of the cost. It was around $15.00. I drilled the 5/8″ hole in the middle of the bottom and screwed it down to the 2×4’s on the table. The gasket around the middle hole is there because I wasn’t sure how much water to expect. Again, I’m not sure it’s totally needed.
Homemade Pottery Wheel The Wheel Head
The wheel head was honestly the part that made me the most nervous. I had visions of loosing my hand, or being cut in half by a deadly frisbee of my own making. But I digress.
Not the best documentation here but,
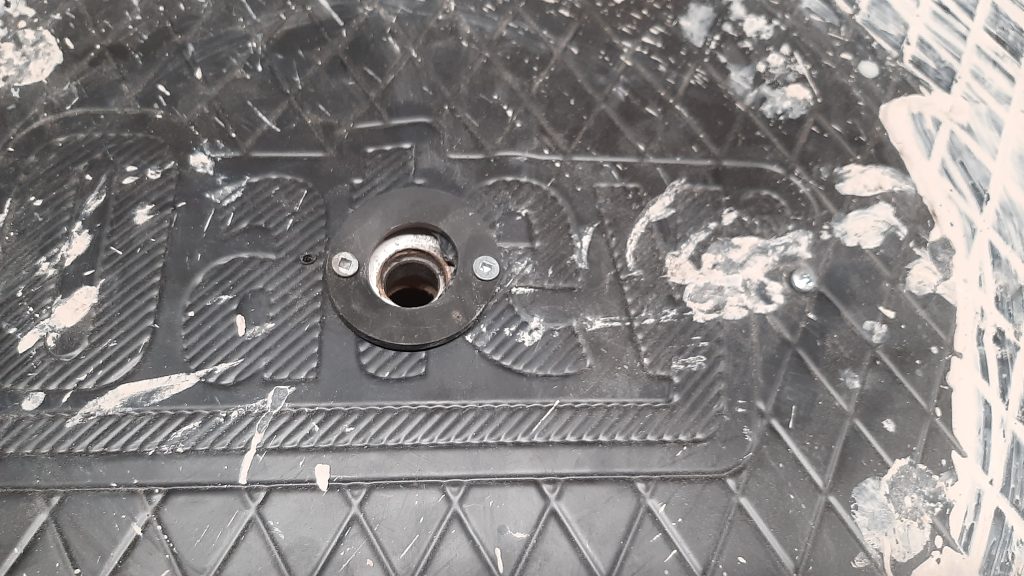
I basically cut out my best circle using all of my geometry skills (which aren’t much), and my jig saw, twice. In the first circle, I drilled a hole in the middle large enough to fit the head of a flanged nut. The nut sits so the edged part (the part you would put your wrench on) is in the hole and the flange stops it from going the whole way through. Then the 1/2″ ready rod (at least that’s what I call it) threads through the top of the nut so in the end the bottom of the flange is the top of the wheel.
A second locking nut and washer is connected to the bottom of the wheel. This locks the whole thing together. The second wooden circle is now connected to the first, by screwing it from the bottom.
With everything attached and spinning, hold some sandpaper on the edges. This will help make everything a circle. Kind of a makeshift wood lathe first, and then a pottery wheel.
From here I can attach battens of some description, if I get into two-piece things, but one step at a time here.
This Little Jewel
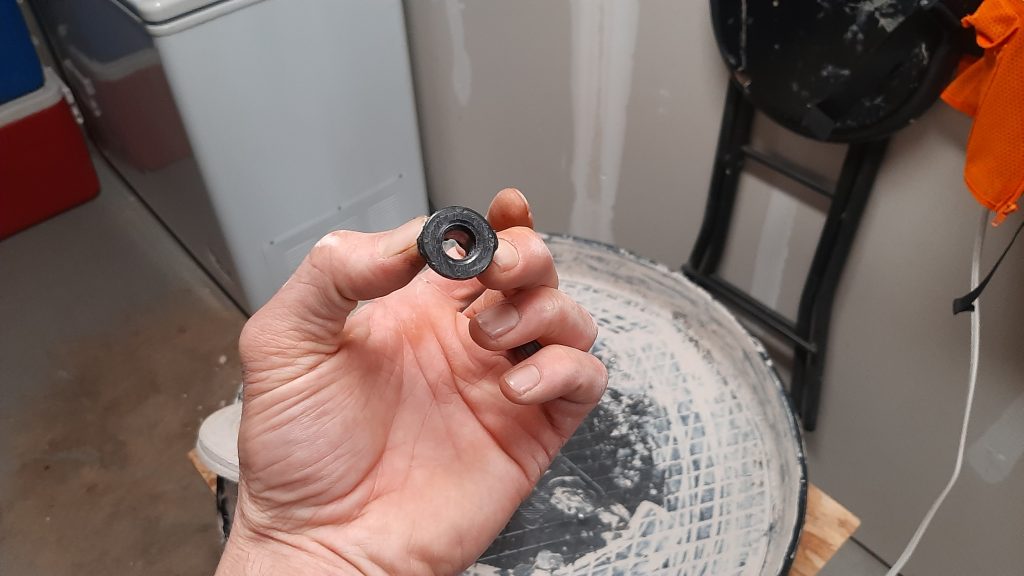
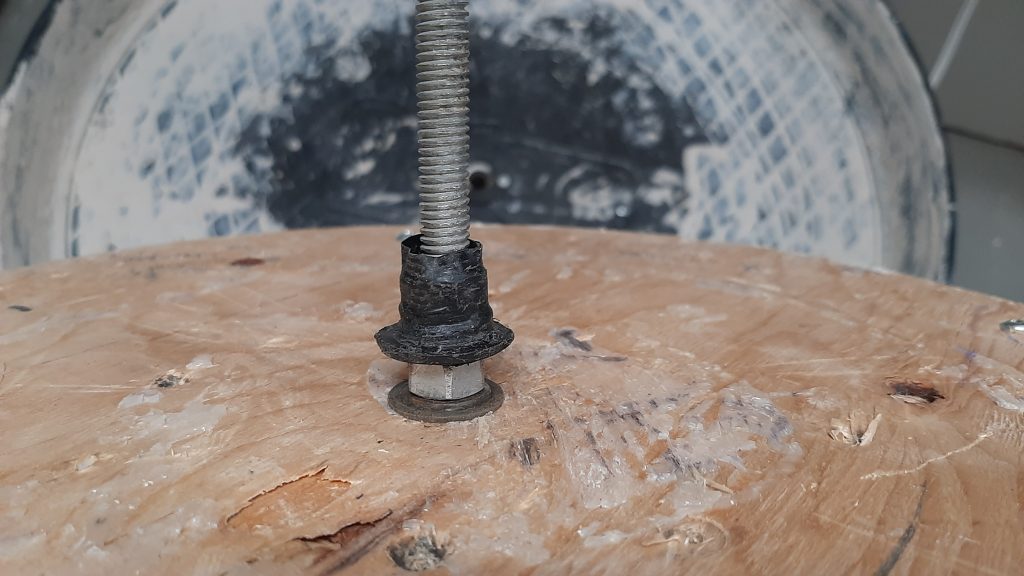
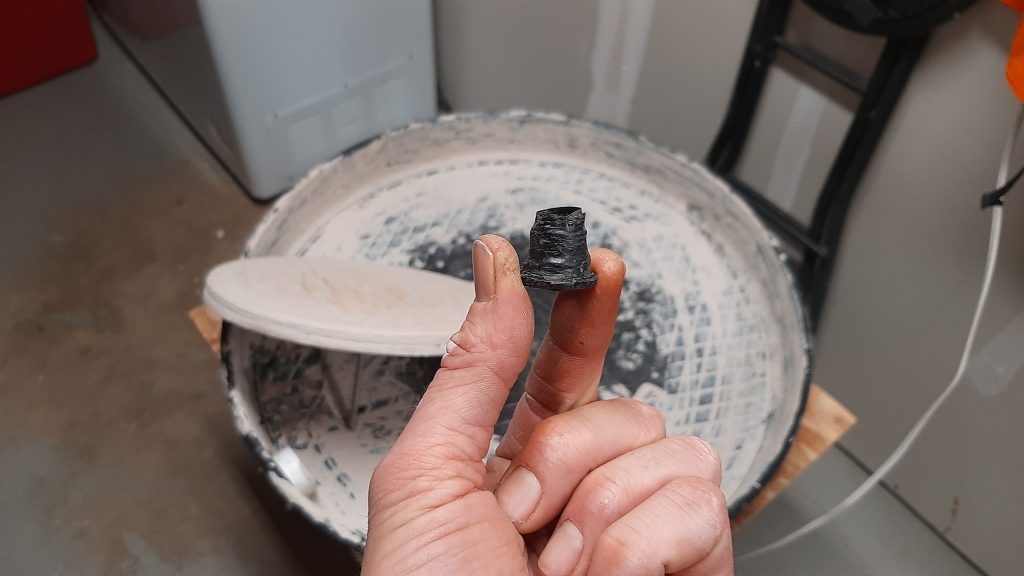
The hardware store had a bearing. Not the right bearing. It may have been my fault, I may have read the measurements wrong in the store. It happens. I also redesigned the shaft to come to the ready rod option, so the original shaft was larger as well. Either way, I needed a….bushing?…sleeve?.. whatever, to make the bearing I had fit the shaft, and save another trip to the store. This was the adapter for a foot pump for an air mattress. I trimmed it down. It takes up the slack and keeps the wheel stable. You could probably just get the proper fitting gear, and save yourself this headache. Just saying.
Everything Level And Plumb
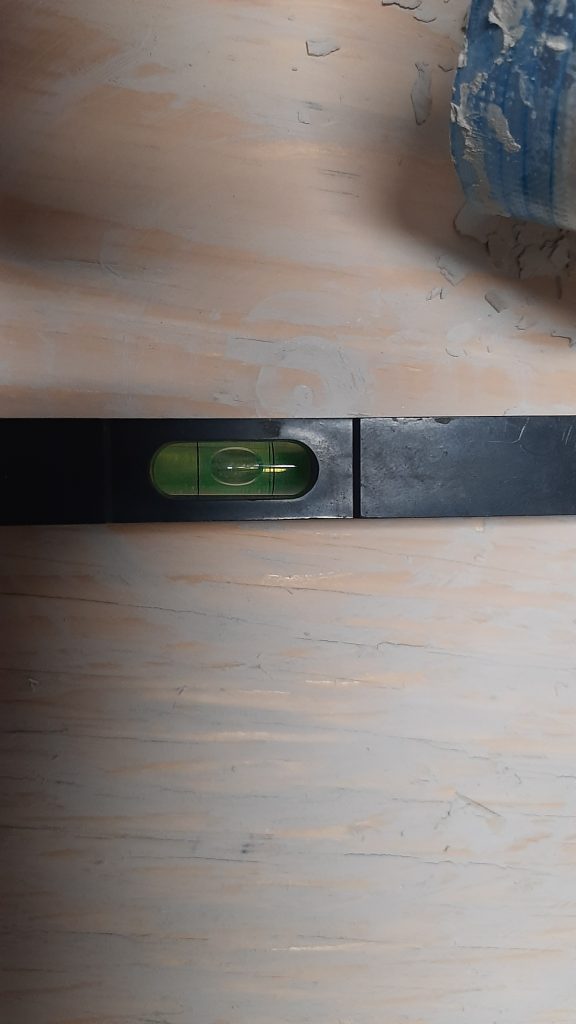

This takes some time at first, and it is easier to do without the splash pan installed. I mounted the wheel into the drill through everything, and snugged it up with my hands. Then, I adjusted the table with the bearing in it, back and forth until the bubble in the level was good both ways. This may require a second person, just to hold the board still to get the first couple screws in. Or screw them in while you hold the board, whatever. Take your time.
Homemade Pottery Wheel The Test
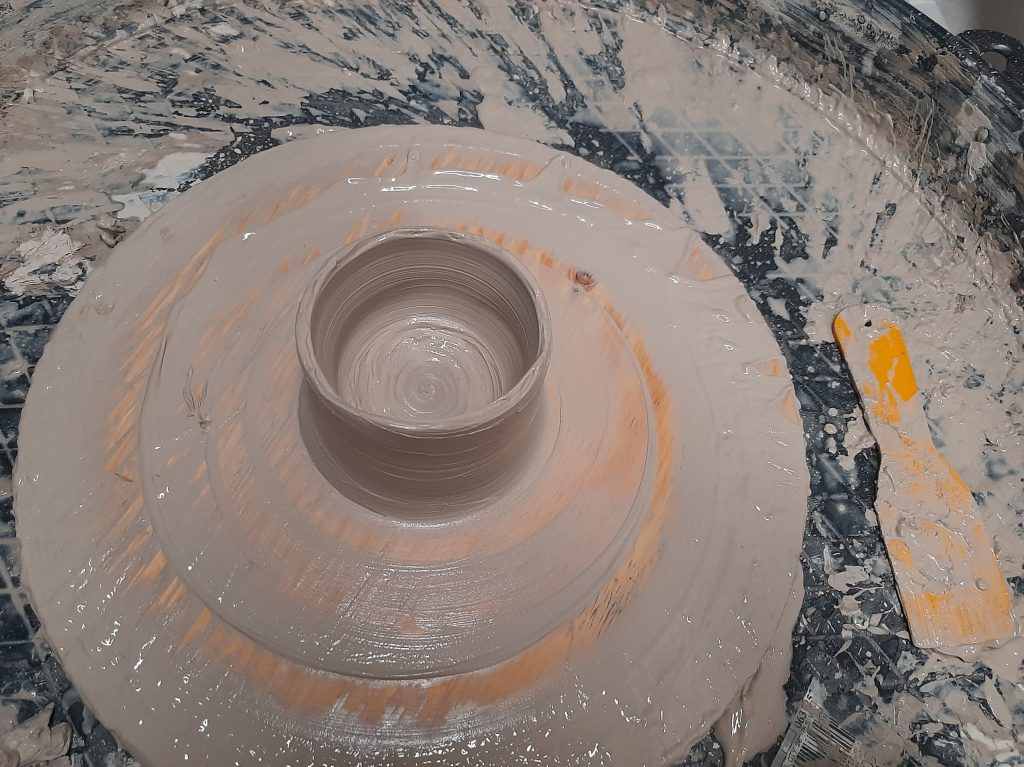
Once everything is “straight” and spins freely, I tightened the chuck of the drill and started it spinning. Holding a sandpaper block against to wood will smooth the top and the edges so you have a nice circle. It gets you into working with a spinning surface also.
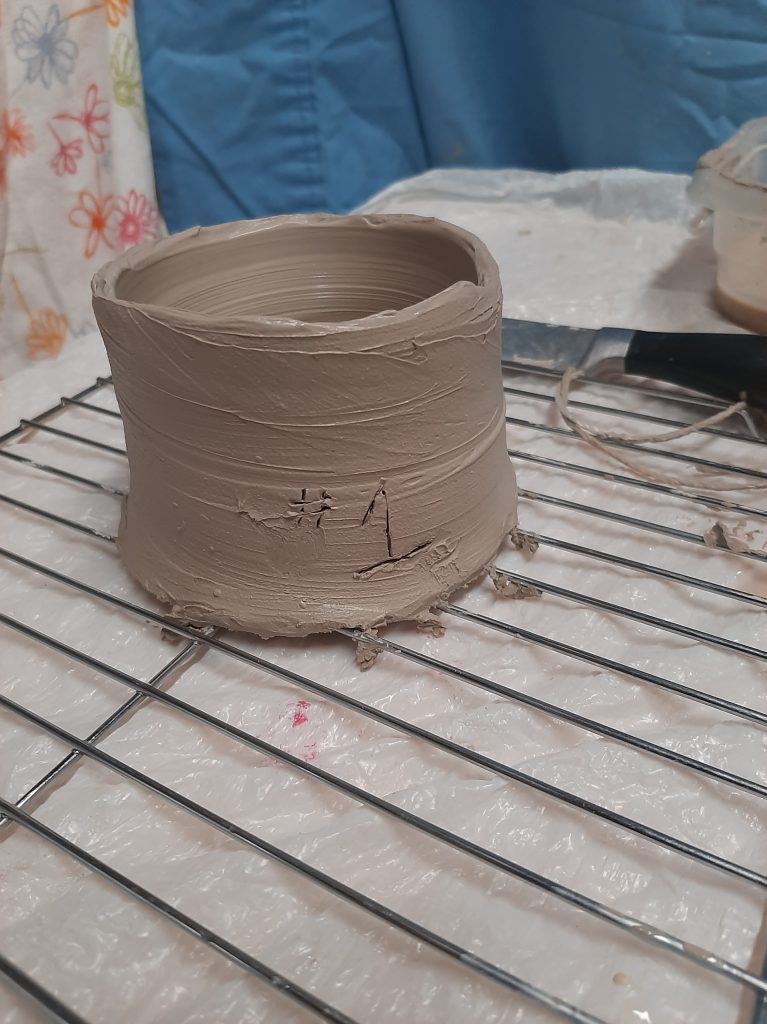
Centering the clay, and all that, is a whole other topic. One I am about to learn all about. In a week or so, this little pot will be dry enough to test the kiln. More to come.