Let’s break it down
Wicking Bed Action – A wicking bed primarily consists of 3 layers. The container, the reservoir and the planting/wicking material. The main container could be anything from a small potter to a large field. The basic idea is that the water “wicks” that is, the water is pulled up into the empty pore spaces in the soil from a water source below. A good illustration of this is a river bank. If you look at the soil, it is wet about a foot above the water level of the river. That’s wicking in action.
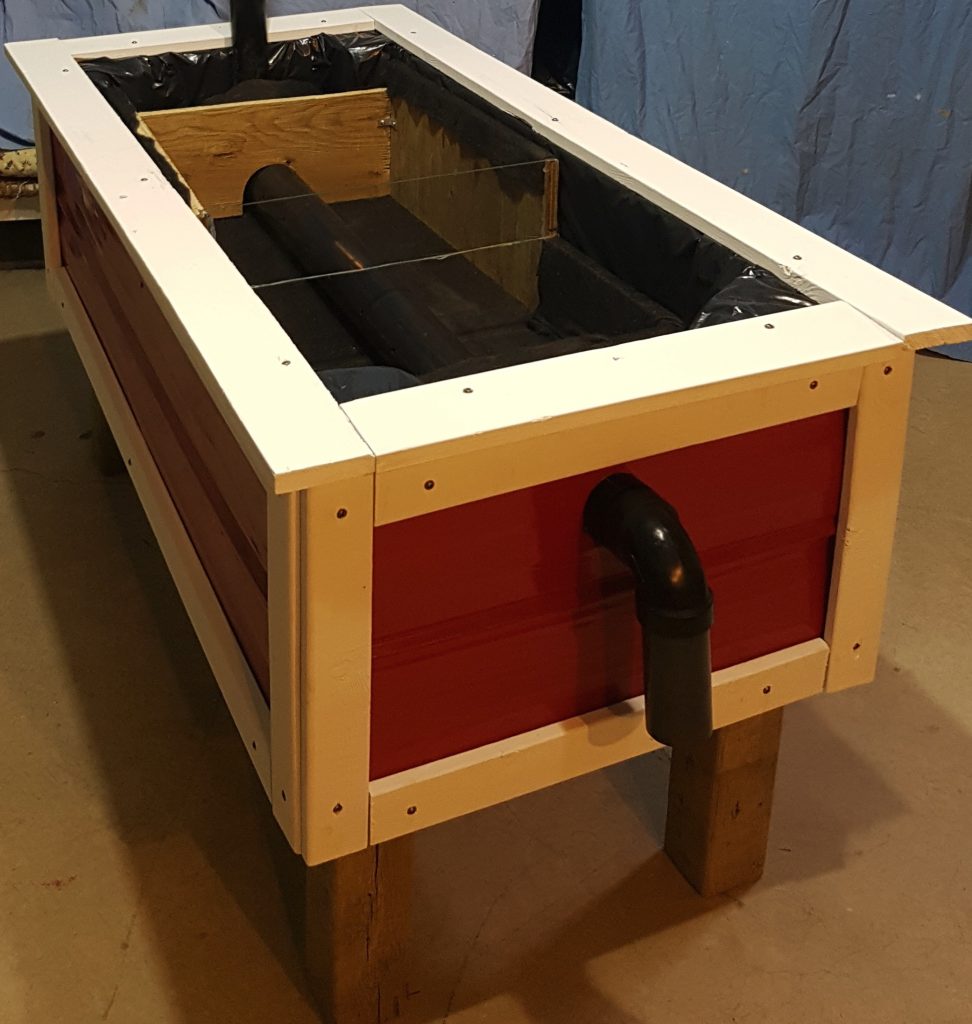
The container can literally be anything that will hold water. The prototype, townhouse deck, and dogwood hedge pages will give you a few more ideas but literally anything indoor or out, big or small, raised or in ground.
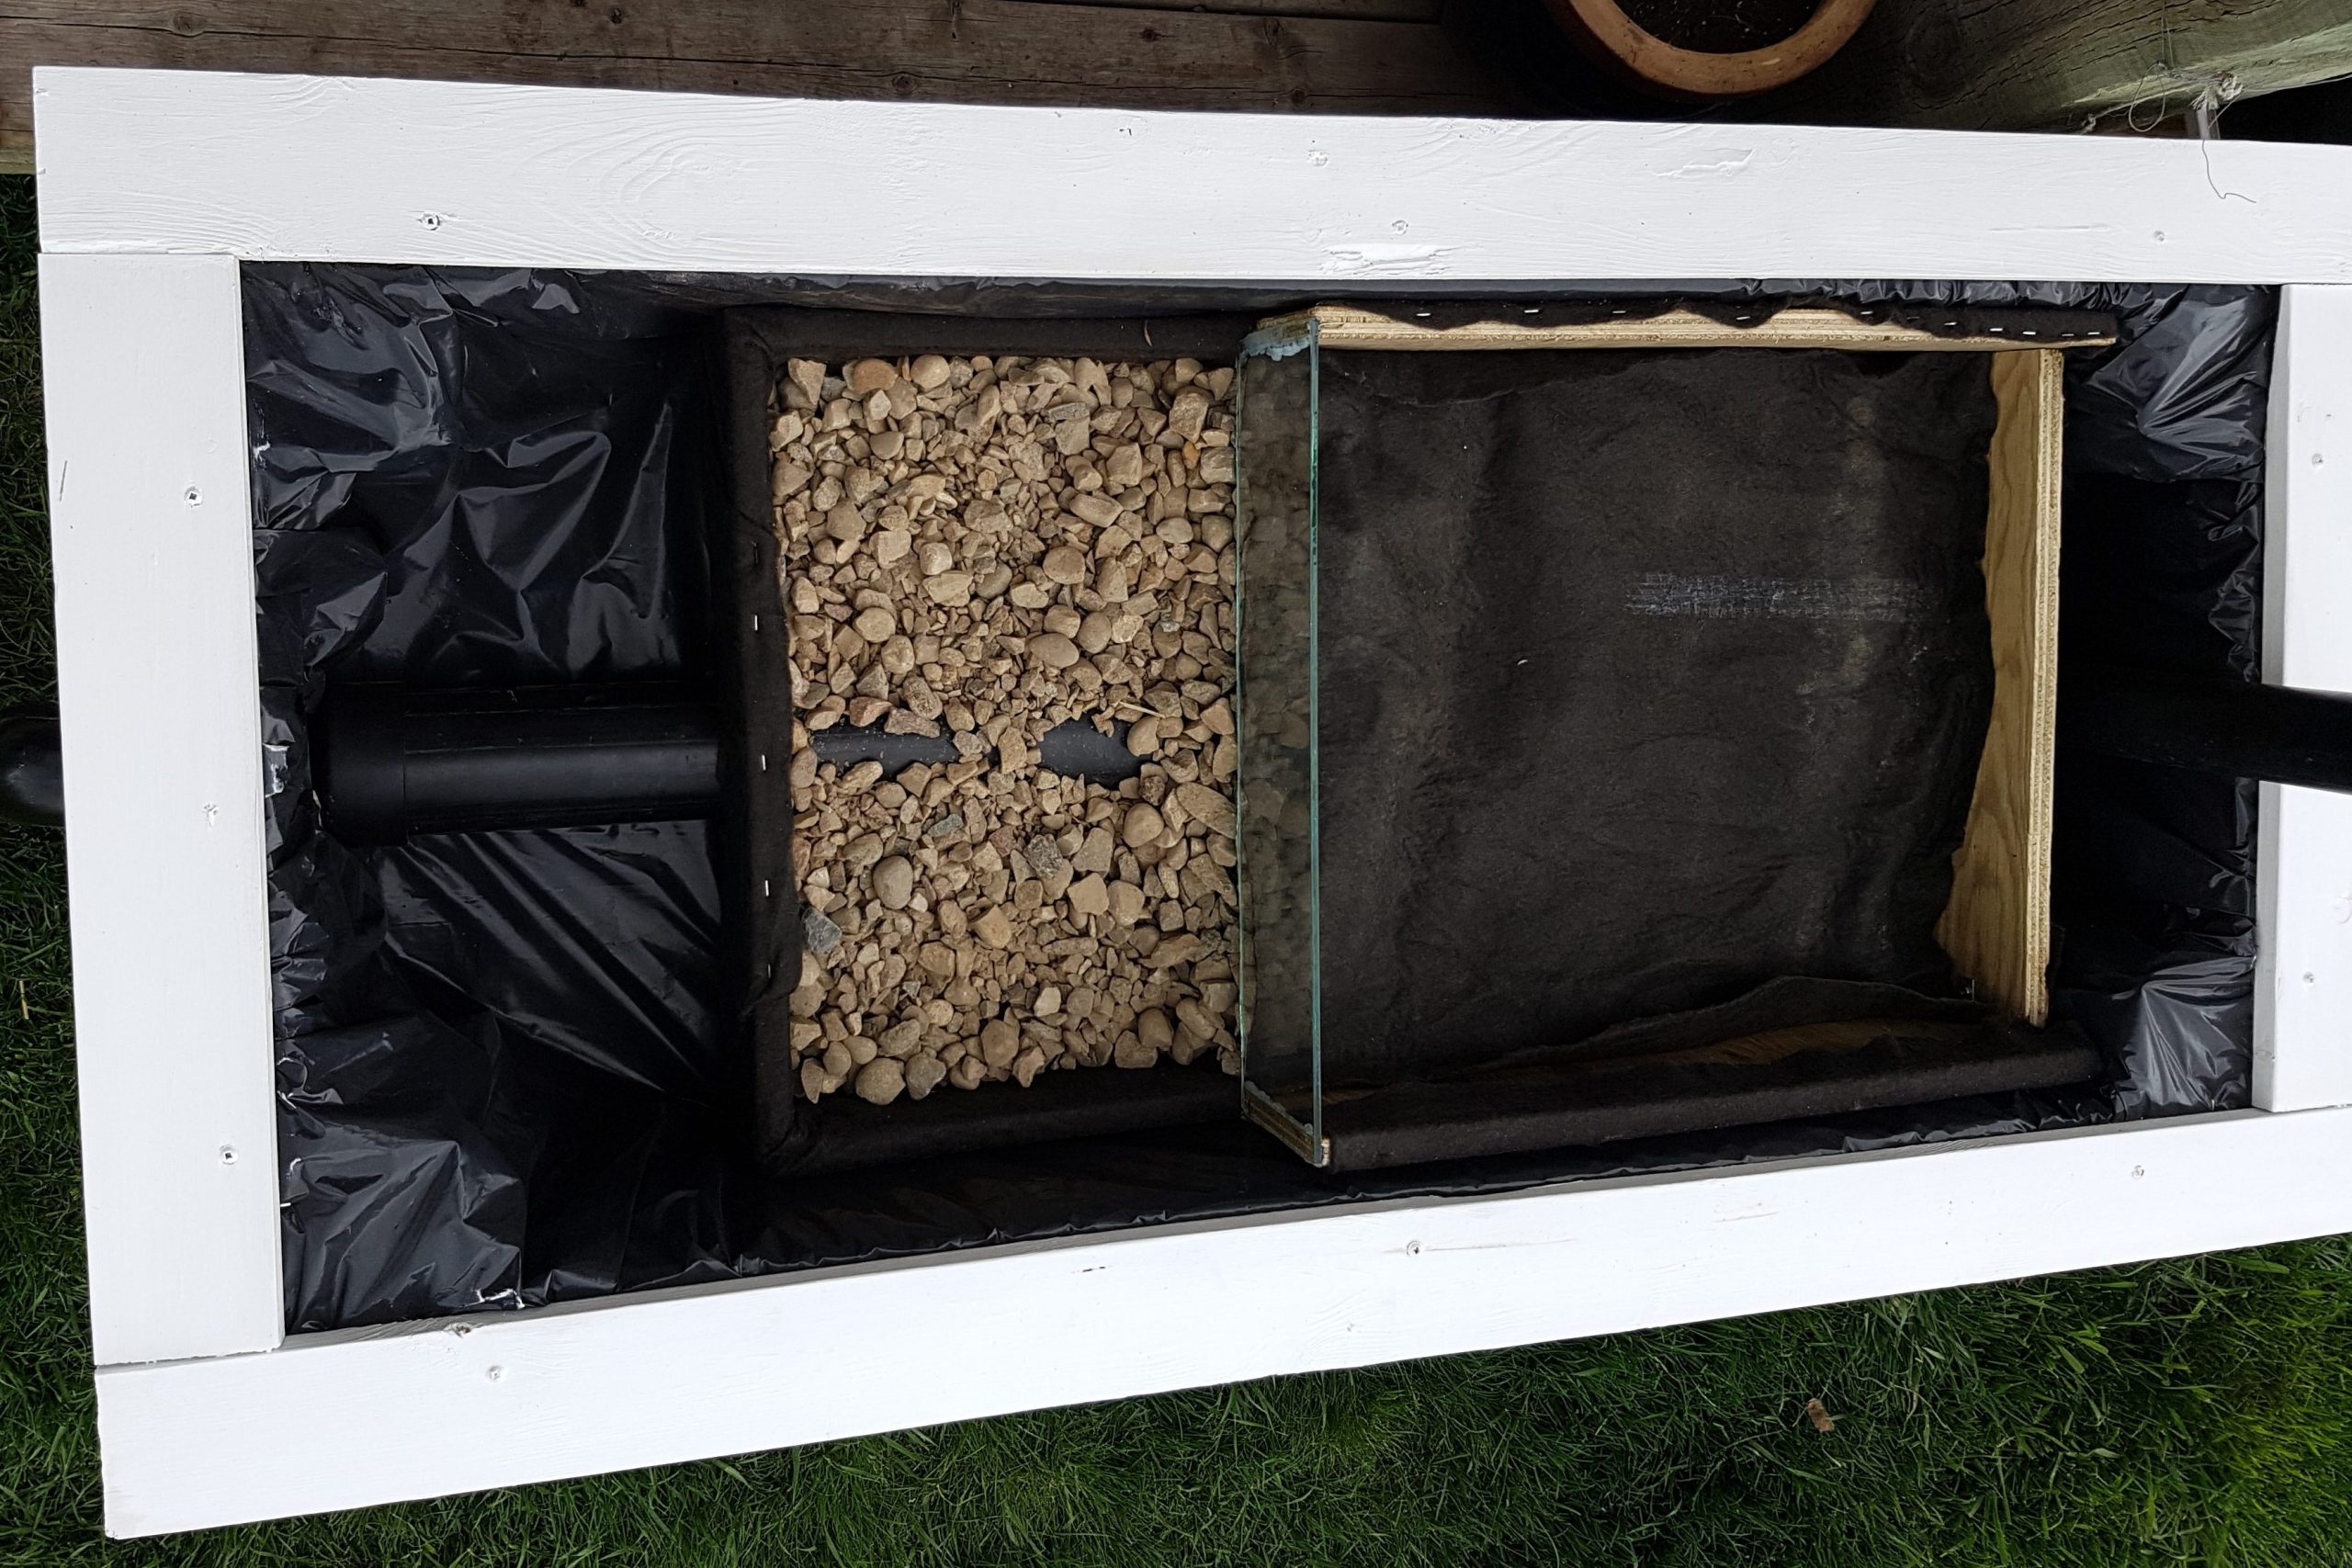
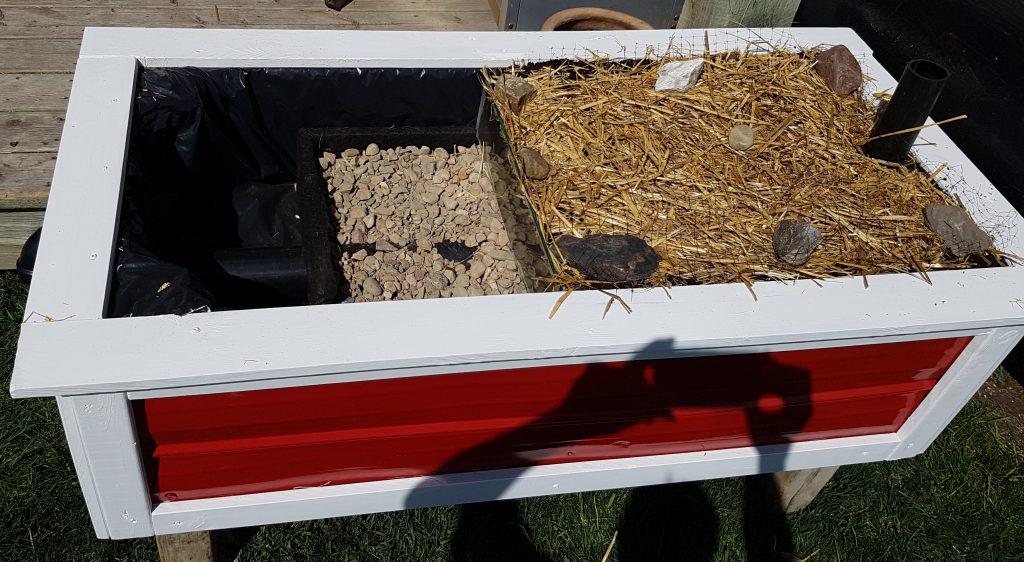
In the picture above, the wooden frame inside the box is for display purposes. I wouldn’t add it to an actual bed I was building.
After you decide which container you want to use,
Filling it up is what makes it a “wicking bed”. If you are building your bed from wood or other non water tight material, you will need to line the bed with something. I have used 6 mil poly in the past. It is user friendly, but very thin. What I do is line the box with a garden fabric or thick root barrier. This will protect the plastic from rough bits of wood. I also double and triple layer the plastic and the add another layer of fabric on top of the plastic. If it is available to you I recommend a thicker pond liner material. It will be a bit tougher to install, but I think the durability will be worth the effort. If you are using a plastic container then you can skip this step all together.
Once the container is water tight and ready to fill up,
The next thing is to install the filler pipe along the bottom with a vertical inlet. This is where things are a bit scalable. You can purchase pots for houseplants that have a reservoir on the bottom for water and a wicking material. If your planter is a bit bigger then a 2″ pipe may be what you need. The dogwood hedge used a 6″ filler pipe. Generally, a 4″ pipe along the bottom of the bed with holes to allow the water out is what you are looking for. “Weeping tile” works well. I have also used straight drain pipe and drilled 1/2′ holes along the length to allow the water out.
Wicking Bed Action – One thing to remember
You want to keep the roots of plants, especially perennials, out of the pipe, they will eventually clog it. To do this, either a layer of fabric needs to be installed directly around the pipe like a sock. These are available commercially. Or a layer of root barrier should be installed between the reservoir and growing materials. Or both.
The vertical part of the filler pipe needs to be able to hold the capacity of the source. If you are draining one side of a 4000 square foot house through a 2″ pipe, then during a thunderstorm it will back up.
The idea is to allow the flow to continue and just hold back what we can.
I have had my beds fill with water during a big storm, but 10 minutes after it passes everything goes back to normal like it never happened. If the vertical pipe is smaller then the horizontal pipe then the water will slow down as it passes under the growing material and so will be less likely to wash anything away.
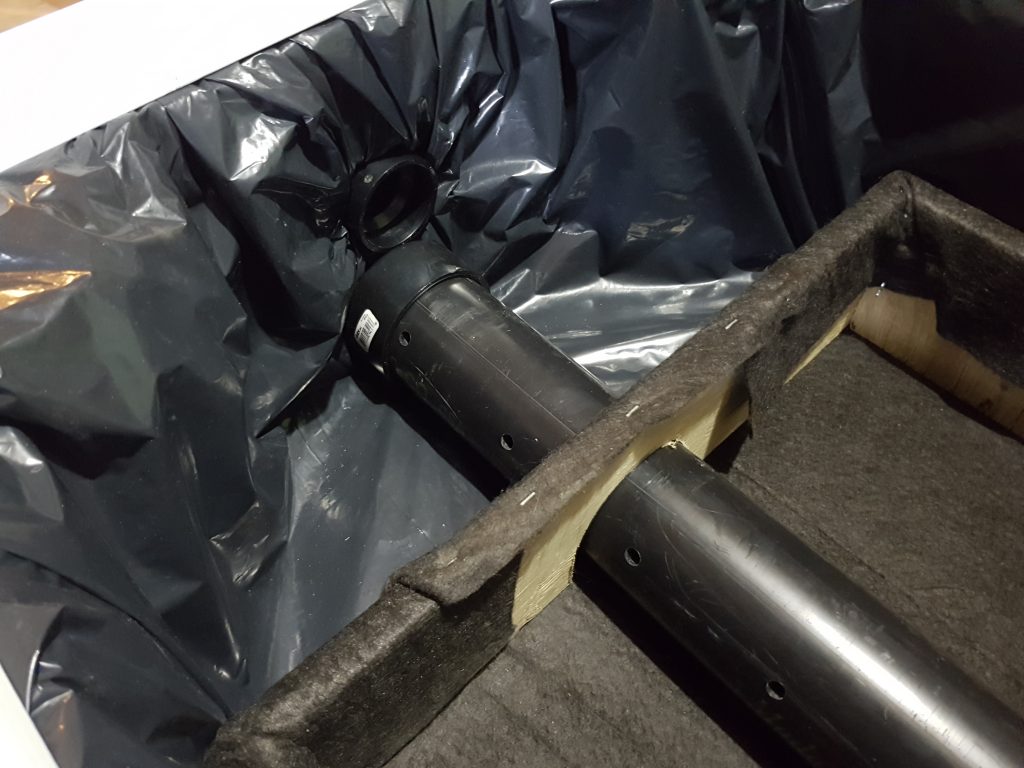
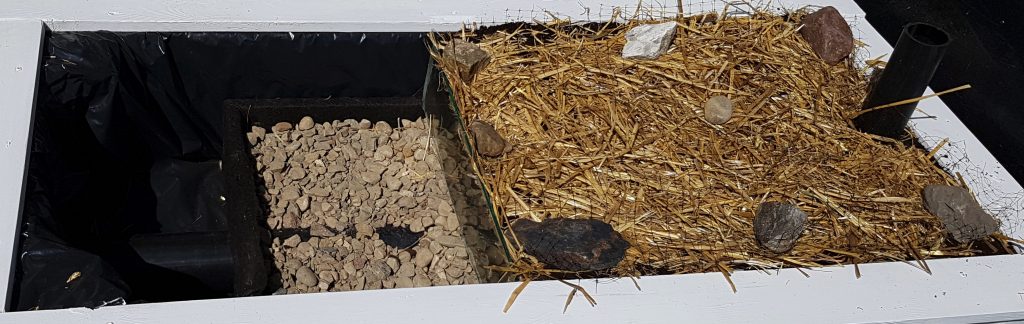
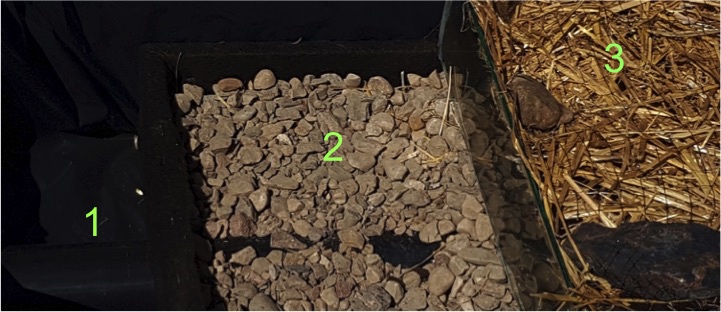
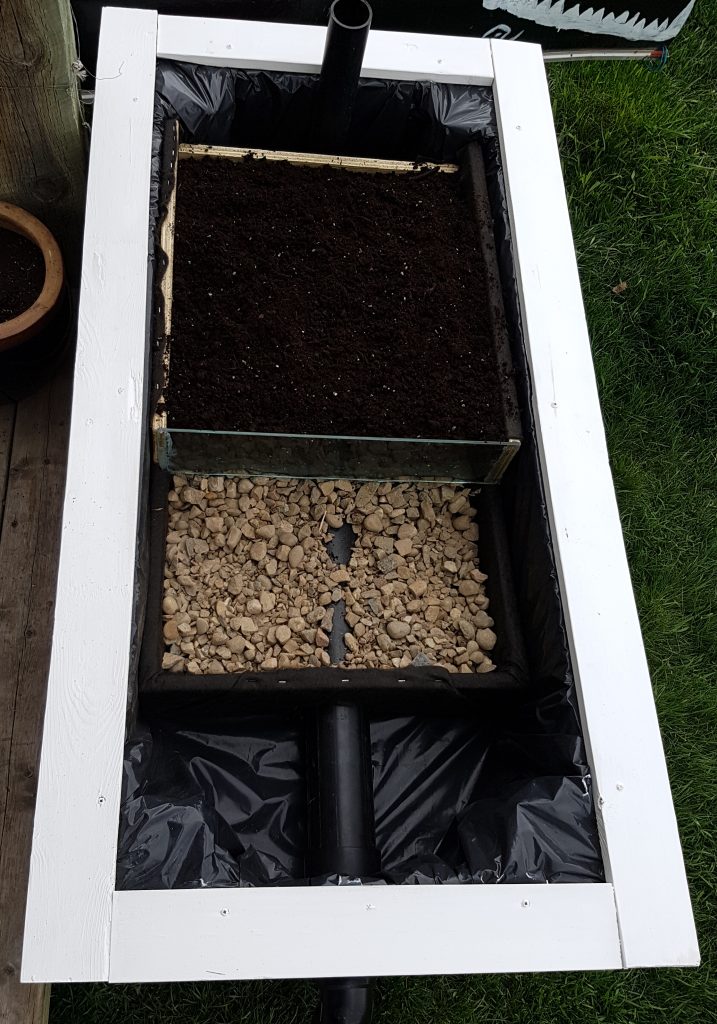
Once the fill pipe is installed with the holes in it. Now we have to think about overflow. The picture above shows where these two parts are. Generally when you cover the pipe with material, you want it to just cover the horizontal fill pipe. That is also the height that you want the overflow. The water will fill the reservoir full and then flow out before getting into the growing material. That is what the plants are for. There is some math to consider here. Just a little though.
Water will only wick up so high.
Pretty much 1 foot for easy math
Plant roots can only sense the water so far. If there is a space between how far up the water will wick and how far down your sprouts roots can “smell” then things won’t grow.
What I do most of the time is keep everything within 2 feet. That’s 1 foot for the reservoir and 1 foot for the growing material. Most vegetables that like this type of soil will do just fine in 1 foot of beautiful soil that is kept just as moist as they like it.
Wicking Bed Action – Not all materials wick the same.
Choose wisely. I like crushed gravel as a reservoir material but you can use a number of things. Gravel has just worked the best for me. The growing material should be a potting mix or a high carbon soil that will wick the best. Some garden soils may work, but if your unsure I would go with a potting mix just to make life easier.

I have used different grains of gravel over the years as well. In the bed above it is more of a pea gravel material which works but I think a bit too fine. 3/4″ crushed gravel would be my recommendation.
Make sure to cover the fill pipe completely.
The gravel, or whatever material you choose, has to do the wicking. The pipe itself will not.

The pipe is exposed in the picture above for illustration. Under the soil the pipe is covered by the gravel.
From the overflow the water can go into another bed either in line or below.
The reservoirs can be thought of the same as rain barrels. They can be plumbed together on the same grade though the piping may get in the way of access. It is much simpler design to go down hill from one bed to the next if they are to be connected in a series. To use as much rainwater as possible, and store even more before it leaves your property is the target.
With the pipe covered with gravel, it is a good idea, even if your pipe is in a sock, to put down layer of root barrier between the reservoir and growing material. I have taken these beds apart before after a couple of years and the roots will get places you never thought possible. If your bed is going to be long term, especially if you are planting perennials, a secondary root barrier is a must.
Now the easy part is to fill the remainder of the space with a growing material. Keep in mind that as the soil settles and gets watered the bed may require a top up of growing material. Actually, it definitely will.
Wicking Bed Action
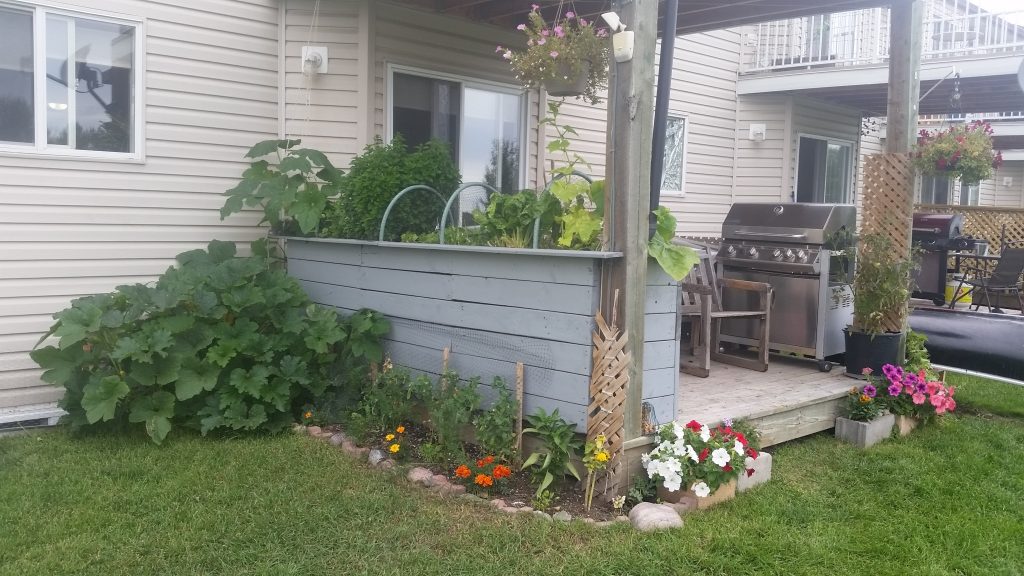
Vegetable garden for small space
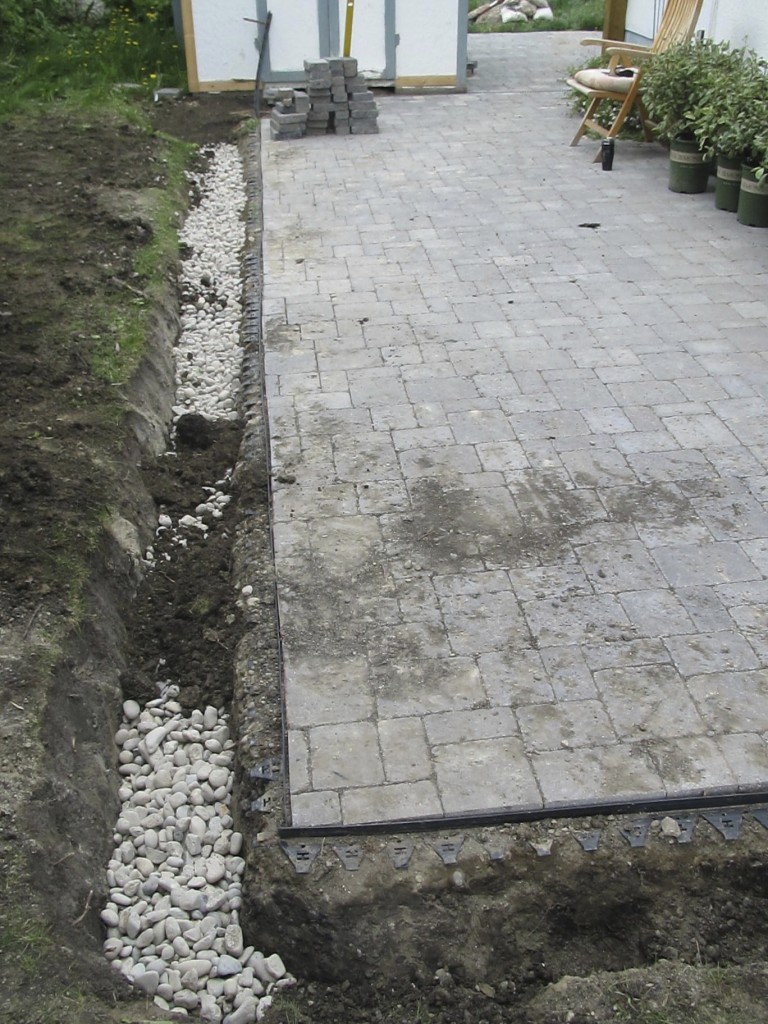
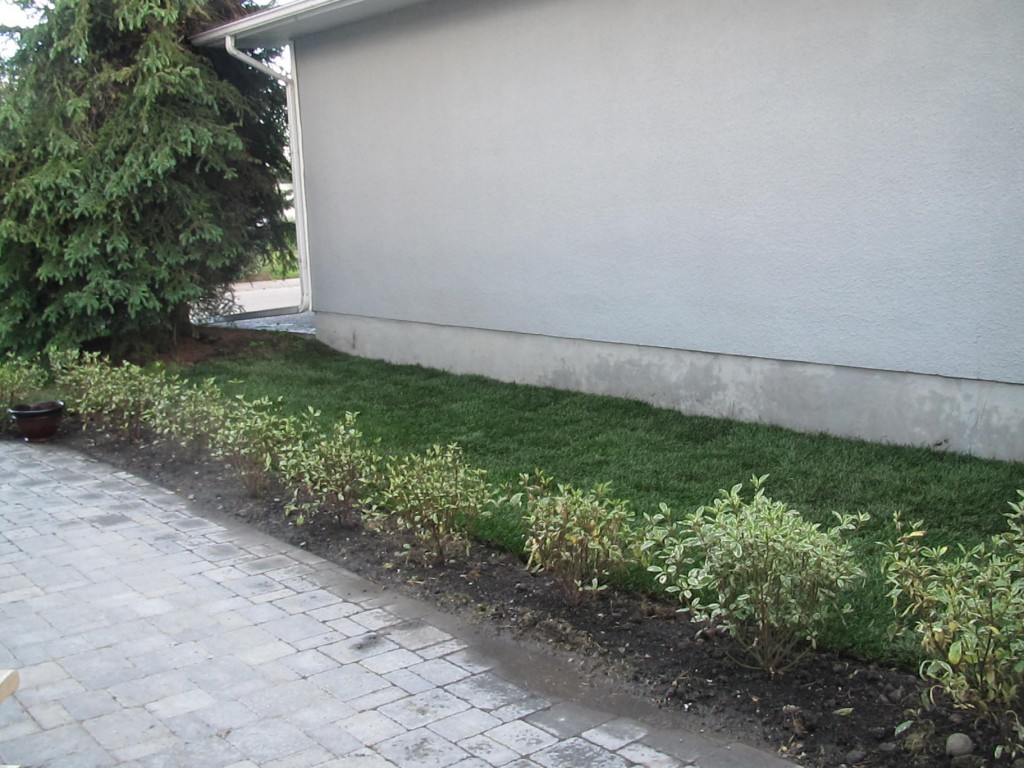
Dogwood hedge patio border
Wicking bed style Dogwood hedge, with new sod, brings the brick patio together nicely.
Townhouse back deck
Don’t forget the ground cover. Straw works well for most vegetable beds
The demonstration bed, that will be at the local markets, fill it up with water!
I improvised a downspout with the garden hose. At the time there is a foot of snow still on my garden, so the test had to be completed in the shop.